
Introduction
Have you ever looked in the mirror and wished your flat, lifeless hair had more bounce, body, and beautiful waves? You are not alone. Millions of people struggle with dull, flat hair every single day. The good news is that one tool can completely transform your look in minutes. That tool is a hair waver. Understanding hair waver basics volume is the first step toward salon-quality waves at home. In this article, you will learn exactly what a hair waver is, how it works, the right heat settings for your hair type, a simple beginner guide, the pros and cons, and how to protect your hair while styling. Whether you are a complete beginner or just looking to improve your technique, this guide has everything you need.
What Is a Hair Waver?
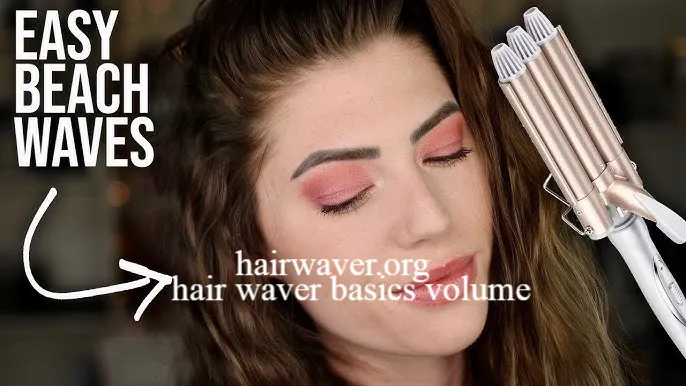
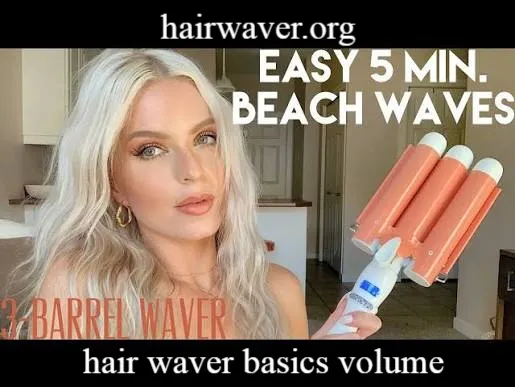
A hair waver is a styling tool designed to create soft, beachy, or defined waves in your hair. Unlike a curling iron, which wraps hair around a single barrel to create tight ringlets, a hair waver has multiple barrels that press the hair into an S-shaped wave pattern all at once. Most hair wavers come with two or three barrels. The result is a more natural, relaxed wave that adds incredible volume and texture to your hair.
Hair wavers come in different barrel sizes too. Smaller barrels around 25mm create tighter, more defined waves. Larger barrels around 32mm to 38mm create loose, voluminous waves that look effortless and full of life.
How Does a Hair Waver Work?
A hair waver works by applying heat directly to sections of your hair through its multiple barrel design. You clamp the barrels around a section of hair and hold for a few seconds. The heat restructures the hair shaft temporarily, locking it into that wave shape. Once you release the clamp and let the wave cool, it holds its form beautifully.
The key to great results is working in small sections. Thinner sections give you more defined waves. Thicker sections give you softer, more relaxed volume. You alternate the direction of each section for a natural, effortless finish.
Is a Hair Waver Easy for Beginners?
Yes, absolutely. A hair waver is actually one of the most beginner friendly styling tools available. Here is why it works so well for new users.
The multiple barrel design does the shaping for you. You do not need to master the rolling or twisting technique required with a curling iron. You simply clamp, hold, and release. Many beginners get excellent results within their very first try.
Quick Beginner Guide
Follow these simple steps before you start:
- Start with clean, dry hair
- Apply a heat protectant spray generously from mid lengths to ends
- Divide your hair into two or three sections using clips
- Set your waver to the right temperature for your hair type (more on this below)
- Work slowly through each section without rushing
Even if your first attempt is not perfect, you will improve fast. Most beginners feel confident with the tool within two to three practice sessions. hairwaver
Step by Step Styling Process
Here is a clear, simple process you can follow every time you style with a hair waver.
Step 1: Prep Your Hair
Wash and fully dry your hair before using any heat tool. Applying heat to damp hair causes serious damage. Use a lightweight heat protectant spray and comb it through evenly.
Step 2: Divide into Sections
Clip the top half of your hair up and out of the way. Work on the bottom layer first. This gives you better control and more even waves throughout. source: Instagram · natgeebeauty
Step 3: Clamp and Hold
Take a one to two inch section of hair. Place it between the barrels of the waver close to your roots, but leave about an inch from the scalp to avoid burns. Clamp down firmly and hold for four to six seconds.
Step 4: Release and Cool
Release the clamp slowly and let the wave fall naturally. Do not touch it while it is still warm. Allow it to cool completely before brushing or separating the waves for more volume.
Step 5: Finish and Set
Once all sections are waved and cooled, gently run your fingers through your hair or use a wide tooth comb for softer waves. Finish with a light hold hairspray to lock in the volume and shape.
Recommended Heat Settings by Hair Type
Using the right temperature is one of the most important hair waver basics volume. Too much heat damages your hair. Too little heat leaves waves that fall flat quickly.
Fine or Damaged Hair
Use a low heat setting between 250 and 300 degrees Fahrenheit. Fine hair is delicate and heats up very quickly. A lower temperature still creates beautiful waves without causing unnecessary breakage.
Normal or Medium Hair
A medium heat setting between 300 and 370 degrees Fahrenheit works well. This range gives you reliable waves that last all day without excessive heat exposure.
Thick or Coarse Hair
Thicker hair needs more heat to hold a wave. Use a setting between 370 and 410 degrees Fahrenheit. Start at the lower end and increase only if needed.
Curly or Already Textured Hair
You can use a lower setting around 300 degrees. Your hair holds wave patterns more naturally, so you do not need extreme heat to get volume.
Always start at a lower temperature and work your way up gradually. This protects your hair and helps you find the sweet spot for your specific hair type.
Can You Use a Hair Waver Every Day?
Technically yes, but it is not recommended. Daily heat styling causes cumulative damage over time. This includes dryness, split ends, and breakage. Most hair experts suggest using a heat styling tool no more than three to four times per week. hairwaver
On your off days, refresh your waves with a curl refreshing spray or a light mist of water mixed with leave in conditioner. This extends the life of your style without adding extra heat.
Pros and Cons of Using a Hair Waver
Pros
- Creates natural looking waves quickly
- Adds serious volume and texture
- Easy for beginners to learn
- Works on most hair types and lengths
- Multiple barrel sizes offer styling variety
Cons
- Regular heat use can dry out hair over time
- Takes practice to get even, consistent waves
- Can be tricky to use on very short hair
- Requires a good heat protectant for safe use
Heat Protection Recommendations
Heat protection is not optional. It is essential. Every single time you use a waver, apply a heat protectant product first. Here are some types worth considering. source: Tymo Beauty
Spray Protectants work well for fine to medium hair. They are lightweight and distribute evenly without adding weight or greasiness.
Cream or Serum Protectants are better for thick or coarse hair. They seal the cuticle more effectively and add a glossy finish.
Leave In Conditioners with Heat Protection are great for dry or damaged hair. They add moisture while shielding the hair from high temperatures.
Look for products that protect up to at least 450 degrees Fahrenheit. Apply it to damp or dry hair before you begin styling, focusing on the ends where damage is most common.
Conclusion
Mastering hair waver basics volume does not have to feel complicated or overwhelming. Once you understand how the tool works, set the right temperature for your hair type, and follow a simple step by step process, you will be creating gorgeous waves in no time. Protect your hair, practice your technique, and enjoy the added volume and texture this amazing tool delivers. Now it is your turn. Have you tried a hair waver before? What is your biggest challenge when styling at home? Share your experience and help someone else on their hair journey.
Frequently Asked Questions
1. What is the difference between a hair waver and a curling iron?
A curling iron wraps hair around one barrel to create ringlets. A hair waver uses multiple barrels to press hair into a wave pattern all at once, giving a more natural look.
2. How long should I hold a hair waver on my hair?
Hold for four to six seconds. Fine or damaged hair may only need three to four seconds. Thicker hair may need up to eight seconds.
3. Can I use a hair waver on short hair?
Yes, but it can be tricky. A smaller barrel waver around 25mm works best on shorter styles. Work carefully near the roots.
4. Do I need to use a heat protectant with a hair waver?
Absolutely. A heat protectant is essential every single time you use any heated styling tool.
5. How do I make my waves last longer?
Let each wave cool completely before touching it. Finish with a light hold hairspray. Avoid heavy products that weigh the waves down.
6. What barrel size gives the most volume?
A 32mm to 38mm barrel creates the loosest, most voluminous waves. Smaller barrels create tighter waves with less overall volume.
7. Is a hair waver safe for color treated hair?
Yes, but use a lower heat setting and always apply a quality heat protectant. Color treated hair is more porous and prone to damage.
8. Can I use a hair waver on wet hair?
No. Always style fully dry hair. Heat on wet hair causes serious damage including breakage and split ends.
9. How do I get even waves with a hair waver?
Work in small, consistent sections. Use the same hold time for each section. Practice makes a big difference within the first few uses.
10. What is the best way to refresh waves the next day?
Use a curl refreshing spray or a light mist of water and leave in conditioner. Scrunch gently and let air dry to revive the shape.
Author Bio: Emma Rhodes is a beauty writer and hair care enthusiast with over six years of experience covering styling tools, haircare routines, and salon techniques. She is passionate about making professional hair knowledge accessible to everyone at home.
email: johanharwen@314gmail.com
Author Name: Emma Rhodes
