Introduction
You have seen those effortless, beachy waves all over social media and thought, “I want that.” So you bought a hair waver. And now it is just sitting on your bathroom counter while you stare at it wondering where to even begin. You are not alone. A lot of people buy a waver and never actually figure out how to use it properly, which means they either burn their hair or end up with waves that fall flat within an hour. Learning the hair waver basics step by step is not as complicated as it looks, but there are some important things you need to know before you start. This guide walks you through every single step, explains why each one matters, covers how to adjust your approach based on your hair type, and gives you practical tips that actually work in real life. Let us get into it.
What Is a Hair Waver and Why Does It Work?
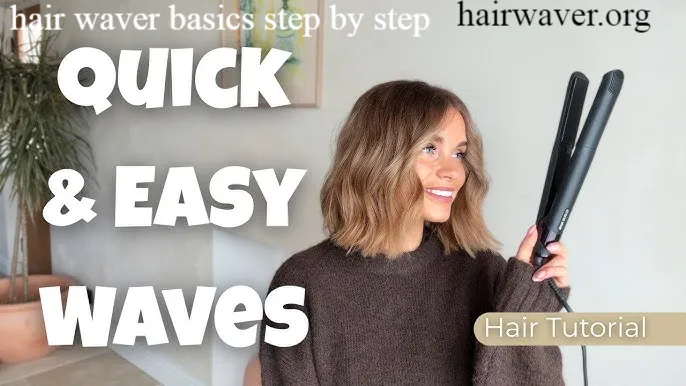
A hair waver is a styling tool with two or three barrels that crimp your hair into a series of connected curves. Unlike a curling iron, which creates spiral curls, a waver creates that relaxed, wavy texture that looks like you spent a weekend at the beach. The multiple barrels shape the hair in alternating directions at the same time, which is why the wave pattern looks so natural.
The heat from the barrels temporarily breaks the hydrogen bonds in your hair. Those bonds are what give your hair its natural shape. When you apply heat and then let the hair cool in a new shape, those bonds reform in the wave pattern. That is the basic science behind why any heat styling tool works.
The key is using enough heat to actually reshape the hair, but not so much that you damage the hair shaft in the process.
Step 1: Dry Your Hair Completely
This is the most important step and the one most beginners skip. You should never put a heat styling tool on wet or even damp hair. When hair is wet, the water inside the hair shaft turns to steam when it contacts a hot tool. That steam has nowhere to go, so it essentially boils inside the hair strand. This causes serious breakage, split ends, and that horrible sizzling sound you might have heard before.
Blow dry your hair fully before you even pick up your waver. If you air dry, wait until your hair is completely dry to the touch, including the underlayers at the back of your head. Those sections take the longest and people often miss them.
If you have thick hair, run a quick blow dryer pass over your roots and underlayers to make sure everything is actually dry before you start waving.
Step 2: Apply Heat Protectant
Do not skip this. A heat protectant is not optional. It is the step that keeps your hair healthy over time, especially if you plan to use your waver more than occasionally.
Heat protectants work by coating the hair shaft with polymers that absorb some of the heat before it reaches the actual hair. They do not make you immune to heat damage, but they significantly reduce it. Think of it like sunscreen for your hair.
Here is how to apply it correctly: hairwaver
- Spray or apply the protectant evenly through your dry hair
- Focus on the mid-lengths and ends, since those sections are the oldest and most vulnerable
- Let it absorb for about 30 seconds before you start styling
- Do not drench your hair in it. A light, even coating is enough
If you have fine hair, use a lightweight spray formula. If you have thick or coarse hair, a cream or serum protectant will give you more coverage and a bit of smoothing at the same time.
Step 3: Divide Your Hair Into Sections
This step is what separates people who get gorgeous, even waves from people who end up with some sections waved and some sections completely untouched. Sectioning your hair is how you make sure the waver reaches every strand.
Here is a simple sectioning method that works for most hair types: hairwaver
- Clip the top half of your hair up and out of the way
- Start with the bottom layer at the nape of your neck
- Take sections that are roughly 1 to 2 inches wide
- Work your way up the head in horizontal layers, releasing one section at a time
The section width matters more than most people realize. If you grab too much hair at once, the inside layers of that section will not get enough heat. Your wave will look uneven and will not last as long. Smaller sections give you more defined, longer-lasting waves. Larger sections give you softer, more relaxed waves.
For fine hair, keep your sections narrow, about an inch wide. For thick hair, you can go slightly wider but do not push past 2 inches or the heat will not penetrate properly.
Step 4: Select the Appropriate Heat Setting
The right heat setting depends entirely on your hair type. Using the wrong temperature is one of the most common mistakes beginners make.
Here is a straightforward guide:
Fine or damaged hair: 250°F to 320°F. Fine hair has a thinner cuticle layer, which means it responds to heat faster and is more vulnerable to damage. Keep the temperature low and the contact time short.
Normal or medium hair: 320°F to 380°F. This is the sweet spot for most people. Enough heat to create a lasting wave without overdoing it.
Thick, coarse, or textured hair: 380°F to 450°F. Thick hair has more mass, so it needs more heat to actually reshape. Using a low temperature on thick hair just means you have to hold the waver in place longer, which actually causes more damage than using the right high temp for a shorter time.
Color-treated or chemically processed hair needs extra care. Drop down one temperature range from what your hair thickness would normally call for, and always use a protectant.
I always tell people to start on the lower end of their range first. You can always go slightly higher if the waves are not holding. You cannot undo heat damage once it happens.
Step 5: Place the Waver on Each Section
Now you are actually waving your hair. Here is exactly how to do it:
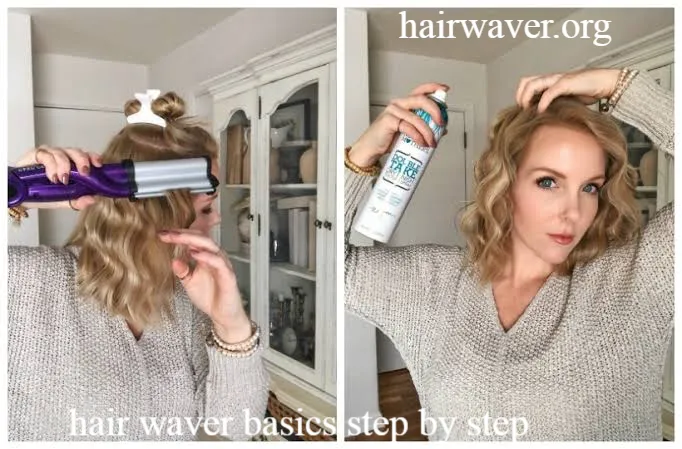
Take one of your sectioned pieces of hair. Hold it taut with your non-dominant hand. Open the waver and clamp it down on the section, starting about an inch away from your roots. Never start at the root. Applying direct heat that close to your scalp is unnecessary and uncomfortable.
Hold the waver closed for 5 to 10 seconds. The timing depends on your hair type. Fine hair needs closer to 5 seconds. Thick hair may need up to 10. Release the waver, slide it down the hair shaft, and clamp again on the next section of hair. Overlap slightly with where you just waved to avoid any uneven gaps.
Continue down the section until you reach the ends. Stop about an inch from the very tips. Waved ends can look a bit stiff and unnatural. Leaving them slightly looser gives a more relaxed, modern finish.
Once you release the waved section, try not to touch it right away. Let it cool in the wave shape for at least 30 seconds. The shape sets as the hair cools. Touching it while it is still warm will cause the wave to drop.
Alternate the direction you flip the hair as you move around your head. This is optional, but it creates a more natural, dimensional look rather than every wave going in the exact same direction. hairwaver
How Hair Type Changes Your Approach
Fine Hair
Fine hair waves quickly and easily, but it also falls quickly. Use a lower heat setting and smaller sections. After waving, spritz a light-hold texturizing spray on each section while it is still warm to help the wave lock in. Avoid heavy products that will weigh the wave down.
Thick Hair
Thick hair needs more heat and more patience. Take your time with each section and do not rush the hold time. If your waves fall out by midday, try increasing your heat by 10 to 20 degrees and holding each section a second or two longer. source: Instagram · natgeebeauty
Straight Hair
Straight hair has a strong natural pattern that wants to revert. Using a bit of styling mousse before you blow dry and wave can help your results last longer. Finish with a light-hold hairspray after waving.
Naturally Wavy Hair
You actually have a head start. Your hair already has some wave memory. Use lower heat and focus on enhancing what is already there rather than trying to force a completely different wave pattern.
Textured or Coily Hair
A waver can create a beautiful elongated wave effect on textured hair. Make sure hair is fully stretched before waving. Use the higher end of the heat range and apply a heat protectant cream rather than a spray for better coverage on each curl.
Real-World Factors That Affect Your Waves
Humidity is the enemy of waves on most hair types. If you live in a humid climate or it is a rainy day, your waves will fall faster. An anti-humidity finishing spray applied after styling makes a real difference. source: Merrick’s Art
Hair thickness affects how long you hold the waver and what temperature you use, as covered above. Do not assume one setting works for everyone.
Product buildup can prevent waves from forming properly. If you notice your results getting worse over time, it might be time for a clarifying shampoo to remove buildup before your next style.
Wave longevity improves when you let each section cool completely before moving on. Patience here pays off for hours of wear time later.
Common Mistakes to Avoid
- Starting on wet hair (always fully dry first)
- Skipping heat protectant (your future hair will thank you)
- Taking sections that are too large (even heat matters)
- Touching the waves while they are still warm (let them set)
- Starting too close to the roots (leave at least an inch of space)
- Rushing the hold time on thick hair (give it the seconds it needs)
Conclusion
Getting beautiful waves with a waver is absolutely something you can do at home, and once you understand the process, it becomes genuinely fast. The hair waver basics step by step come down to this: start with completely dry hair, protect it with a heat protectant, section it properly, choose the right temperature for your hair type, and give each section enough time to actually set before you move on. Adjust your technique based on whether your hair is fine, thick, wavy, or textured, and pay attention to real-world factors like humidity and product buildup.
The more you practice, the faster and better you will get. Most people find that by their third or fourth session, the whole process takes under 20 minutes.
Now that you know exactly what to do, are you going to try it this week? Share this guide with a friend who is also figuring out their waver for the first time. They will appreciate it.
Frequently Asked Questions
What is the best temperature for a hair waver for beginners? For most beginners with medium-thickness hair, starting around 340°F to 360°F is a safe and effective starting point. Adjust up or down based on your hair type.
How long do you hold a hair waver on each section? Most hair types need 5 to 10 seconds per section. Fine hair needs closer to 5 seconds. Thick or coarse hair may need the full 10 seconds.
Should I use a hair waver on dirty or clean hair? Second-day hair actually works great for waving. It has a bit of natural texture and oil that helps waves hold longer. Avoid freshly washed hair if you can, as it tends to be too slippery for waves to last.
How do I make my waves last longer? Let each section cool before touching it, use a light-hold spray after styling, and avoid touching your hair too much throughout the day. An anti-humidity spray helps in warm or wet weather.
Can I use a hair waver on short hair? Yes, but it works best on hair that is at least shoulder length. For shorter hair, use a smaller waver and take very thin sections.
Do I need to curl or wave my entire head? Not necessarily. Many people only wave the top and visible layers, leaving the underlayers natural. This saves time and still gives a full, wavy appearance.
Is a hair waver damaging to hair? Any heat tool can cause damage if used incorrectly or too frequently. Using a heat protectant, the correct temperature, and not overdoing the contact time keeps damage to a minimum.
What is the difference between a 2-barrel and 3-barrel waver? A 2-barrel waver creates a looser, more subtle wave. A 3-barrel waver creates a more defined, classic wave pattern. Beginners often find the 3-barrel easier to use because the pattern is more consistent.
Can I use a hair waver on color-treated hair? Yes, but use a lower temperature than you normally would and always use a heat protectant. Color-treated hair is more porous and more vulnerable to heat damage.
Why are my waves falling out so fast? The most common reasons are using too low a temperature, not holding long enough, touching waves while they are still warm, or skipping a finishing product. Try adjusting one factor at a time to see what makes the difference.
Hair Waver Basics After Styling
About the Author: Casey Monroe is a beauty and hair care writer with over seven years of experience covering styling tools, hair health, and at-home beauty routines. Casey has contributed to several lifestyle and beauty platforms and is passionate about making professional-level techniques accessible for everyday people. When not testing the latest styling tools, Casey is experimenting with new hair care routines and helping readers feel confident about their beauty choices.
email: johanharwen@314gmail.com
Author Name: Casey Monroe