Introduction
Halloween baking should feel fun, not stressful. If you want a treat that instantly brings a spooky mood to your kitchen, Halloween shaped cookies are a wonderful choice. You can make pumpkins, ghosts, bats, witches, skulls, black cats, and other fun designs with simple sugar cookie dough.
The best part is that you do not need advanced decorating skills to make them look impressive. A few cookie cutters, colorful royal icing, and simple decorating techniques can turn an ordinary batch into a festive centerpiece. You can also involve children and let everyone create their own designs.
In this guide, you will learn how to make Halloween shaped cookies from scratch. You will also find practical measurements, baking temperatures, decorating ideas, storage tips, and answers to common questions. Whether you are preparing cookies for a Halloween party or simply want a cozy baking project, these tips can help you get crisp shapes and delicious results.
What Are Halloween Shaped Cookies?
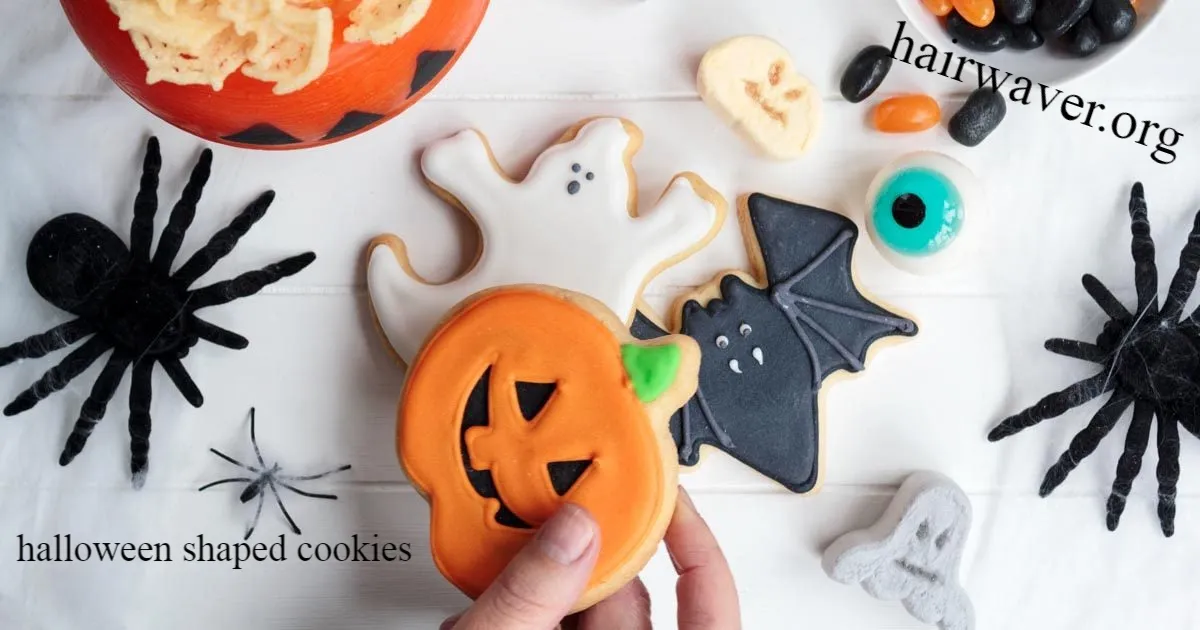
Halloween shaped cookies are festive cookies cut and decorated in spooky shapes such as pumpkins, ghosts, bats, witches, and skulls.
They are usually made with sugar cookie dough because it is easy to roll and cut. The dough should be firm enough to hold its shape during baking. Once the cookies cool, you can decorate them with royal icing, sprinkles, edible glitter, or colored sugar.
These cookies are especially popular for Halloween parties, school celebrations, family baking days, and homemade gift boxes.
What Are the Most Popular Halloween Cookie Shapes?
The most popular shapes include pumpkins, ghosts, bats, witch hats, skulls, black cats, spiders, and monsters.
You can choose shapes based on the age of your guests and the type of celebration you are planning. For a family party, friendly ghosts and smiling pumpkins are great choices. For an adults only gathering, skulls, spiders, and creepy monsters can create a more dramatic look.
Some popular ideas include:
- Pumpkin cookies with orange icing and green stems
- Ghost cookies with white icing and chocolate eyes
- Bat cookies with black icing and purple details
- Witch hat cookies with green and orange decorations
- Skull cookies with white icing and dark details
- Black cat cookies with yellow eyes
- Spider cookies with chocolate decorations
How Do You Make Halloween Shaped Cookies?
You can make Halloween shaped cookies with basic pantry ingredients and a few simple tools.
What Ingredients Do You Need?
For about 24 medium cookies, you will need:
- 2 and 3 quarter cups all purpose flour
- 1 cup unsalted butter, softened
- 3 quarter cup granulated sugar
- 1 large egg
- 1 teaspoon vanilla extract
- 1 quarter teaspoon salt
- 1 half teaspoon baking powder
For decorating, prepare royal icing, food coloring, sprinkles, and edible decorations as desired.
How Do You Prepare the Cookie Dough?
Start by beating the softened butter and sugar together until light and creamy. Add the egg and vanilla, then mix until combined.
In another bowl, combine the flour, salt, and baking powder. Gradually add the dry ingredients to the butter mixture. Mix just until the dough comes together.
Avoid overmixing because it can make the cookies tougher. Wrap the dough and refrigerate it for at least 30 minutes before rolling.
How Do You Cut Halloween Cookies Into Shapes?
Roll the chilled dough on a lightly floured surface until it is about 1 quarter inch thick.
Use Halloween cookie cutters to create your preferred shapes. Press the cutter firmly into the dough, then carefully lift the shape onto a prepared baking sheet.
Try to keep the thickness consistent. Cookies with similar thickness will bake more evenly.
If the dough becomes soft while you work, place it back in the refrigerator for about 10 minutes. This simple step can make cutting much easier. hairwaver
How Do You Keep Halloween Cookies From Spreading?
Chill the cookie dough before baking, avoid adding too much flour, and bake the cookies on a properly prepared baking sheet.
The temperature of the butter also matters. Very soft or melted butter can cause the cookies to spread. Keep the dough cool and handle it as little as possible.
You should also avoid placing dough shapes on a warm baking sheet. A cool sheet helps the cookies maintain their defined edges.
For especially detailed shapes, refrigerate the cut cookies for another 10 to 15 minutes before baking.
What Temperature Should You Bake Halloween Cookies At?
Bake the cookies at 350°F or 175°C for about 8 to 12 minutes.
The exact time depends on the size and thickness of your cookies. Smaller cookies may finish closer to 8 minutes, while larger shapes may need 10 to 12 minutes.
Look for lightly golden edges while keeping the centers relatively pale. Let the cookies cool on the baking sheet for about 5 minutes before transferring them to a wire rack.
Do not decorate the cookies while they are warm. Even slightly warm cookies can cause icing to melt or lose its shape.
What Is the Best Icing for Halloween Cookies?
Royal icing is one of the best choices because it dries firm and works well for detailed Halloween designs.
You can divide the icing into small bowls and add different food colors. Orange, black, white, purple, green, and red are especially useful for Halloween designs. source: Taste of Home
For simple decorating, use thicker icing to create outlines and slightly thinner icing to fill the inside. Allow each layer to dry before adding small details.
You can also use melted chocolate for eyes, spider legs, facial expressions, and other fine decorations.
How Can You Decorate Halloween Shaped Cookies?
You can decorate cookies as simply or creatively as you like.
For a beginner friendly approach, start with an outline around each cookie. Fill the center with matching icing and gently spread it toward the edges.
Try these easy combinations:
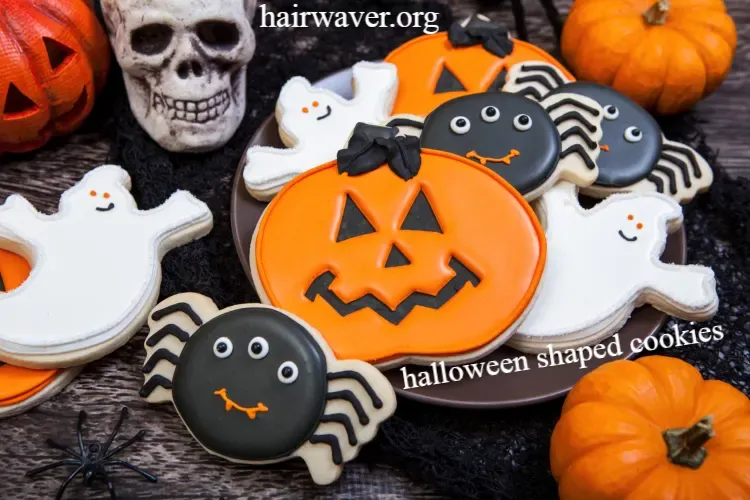
- Orange icing with black details for pumpkins
- White icing with black eyes for ghosts
- Black icing with purple accents for bats
- Green icing with orange details for witch hats
- White icing with black lines for skulls
- Black icing with yellow eyes for cats
You can also add small sprinkles before the icing sets. This gives the cookies extra texture without requiring complicated decorating skills.
How Far Ahead Can You Make Halloween Cookies?
You can bake the cookies up to several days before your Halloween event.
Once completely cooled, place them in an airtight container. Separate layers with parchment paper if you are stacking decorated cookies.
For the best texture and flavor, enjoy them within about 5 to 7 days when stored at room temperature.
If you need to prepare them earlier, you can freeze undecorated cookies. Place them in an airtight freezer safe container with parchment between layers. They can generally be frozen for about 2 to 3 months.
Thaw them at room temperature before decorating.
How Do You Store Halloween Shaped Cookies?
Store fully cooled cookies in an airtight container at room temperature.
Keep decorated cookies away from moisture and direct sunlight. Humidity can soften the cookies and affect royal icing decorations.
If you are stacking them, make sure the icing has completely dried first. Otherwise, decorations can stick together and become damaged.
For parties, arrange the cookies on a serving tray shortly before guests arrive. This keeps them looking fresh and attractive.
What Are Some Easy Halloween Cookie Ideas for Kids?
Kids can have fun decorating simple shapes without needing perfect designs.
Give them cooled cookies, small bowls of colored icing, sprinkles, and edible decorations. Let them create silly faces, friendly monsters, colorful pumpkins, and funny ghosts.
You can also set up a small decorating station. Place each cookie on parchment paper and give children their own decorating supplies. source: Sally’s Baking Addiction
The goal does not have to be perfection. Handmade decorations often make the cookies more memorable.
Can You Make Halloween Shaped Cookies Without Special Equipment?
Yes, you can make them without professional baking equipment.
Cookie cutters make the process easier, but you can create simple shapes with a knife or use a glass for round cookies. For decorating, a piping bag is helpful, but a small food storage bag with a tiny corner cut away can work for simple icing designs.
A rolling pin, baking sheet, parchment paper, mixing bowls, and cooling rack are enough for most home kitchens.
What Common Mistakes Should You Avoid?
A few simple mistakes can affect the shape and texture of your cookies.
Avoid these problems:
- Do not melt the butter before mixing the dough.
- Do not skip chilling the dough.
- Do not roll the dough too thin.
- Do not overcrowd the baking sheet.
- Do not decorate cookies before they cool completely.
- Do not stack cookies while royal icing is still wet.
- Do not overbake if you prefer soft centers.
I find that keeping the dough cool is one of the easiest ways to get cleaner shapes. It also makes the cutting process much less frustrating.
How Do You Make Halloween Shaped Cookies Look Professional?
Focus on clean edges and simple designs rather than trying to add too many details.
Use consistent cookie thickness and let each icing layer dry before adding another. A limited color palette can also make the finished cookies look more polished.
For example, use orange, black, and white for a classic Halloween theme. Add tiny details such as eyes, smiles, stripes, or dots after the base icing has dried.
Simple designs often look better than crowded ones.
Conclusion
Halloween shaped cookies are an easy and creative way to bring Halloween into your kitchen. With chilled sugar cookie dough, reliable baking temperatures, and royal icing, you can create pumpkins, ghosts, bats, skulls, cats, and many other festive designs.
Bake them at 350°F or 175°C for about 8 to 12 minutes, depending on their size. Let them cool completely before decorating, and store finished cookies in an airtight container for the best results.
Whether you are baking with children or preparing treats for a party, these cookies give you plenty of room to be creative. Which spooky shape would you make first?
FAQs
What are Halloween shaped cookies?
Halloween shaped cookies are sugar cookies cut into festive shapes such as pumpkins, ghosts, bats, skulls, cats, spiders, and witch hats.
How thick should Halloween cookie dough be?
About 1 quarter inch is a good thickness for shaped sugar cookies. It provides enough structure while allowing the cookies to bake evenly.
How long should Halloween cookies bake?
Most medium cookies need about 8 to 12 minutes at 350°F or 175°C. Watch the edges carefully to avoid overbaking.
Why do my Halloween cookies spread?
Cookies can spread when the butter is too warm, the dough is not chilled, or the baking sheet is warm. Keeping the dough cool helps preserve the shapes.
What icing works best for Halloween cookies?
Royal icing is an excellent choice because it dries firm and allows you to create detailed outlines, fills, faces, and decorations.
Can I freeze Halloween cookies?
Yes. Undecorated cookies can be stored in a freezer safe airtight container for about 2 to 3 months. Thaw them at room temperature before decorating.
How long do decorated Halloween cookies last?
When stored properly in an airtight container at room temperature, decorated cookies are generally best within 5 to 7 days.
Can children decorate Halloween cookies?
Absolutely. Give children cooled cookies, colored icing, sprinkles, and edible decorations. Simple shapes such as pumpkins and ghosts are especially easy for beginners.
The Great British Bake Off Season 10
About the Author: Awais khan A passionate food and baking writer who enjoys turning simple ingredients into fun, approachable recipes. Their goal is to make home baking easy, creative, and enjoyable for every skill level.
email: johanharwen@314gmail.com
Author Name: Awais khan