
Introduction
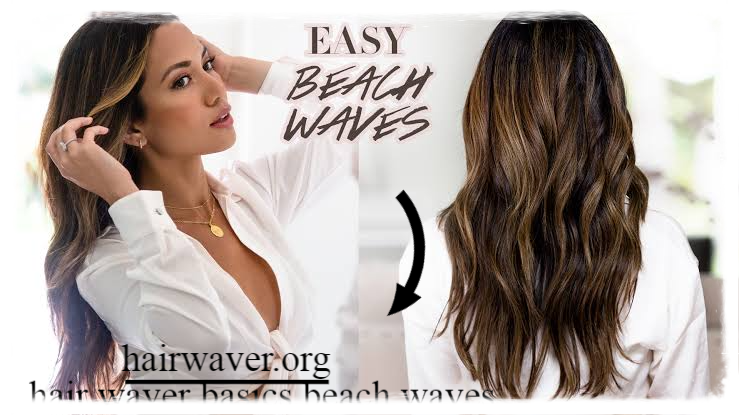
If you have ever scrolled through social media and wondered how influencers get those effortless, tousled waves every single day, the answer is probably simpler than you think. Understanding hair waver basics beach waves is the first step toward recreating that look in your own bathroom mirror. A hair waver is one of those tools that looks intimidating at first but becomes shockingly easy once you know what you are doing.
You do not need a professional stylist or hours of free time to get soft, beachy texture. With the right tool and a little practice, you can go from flat and lifeless to wavy and full of movement in about fifteen minutes.
This article covers everything you need to know. We will talk about what a hair waver actually is, how to use one properly, whether beginners can handle it, and how long your waves will realistically last. By the end, you will feel confident enough to grab your waver and get started.
What Is a Hair Waver
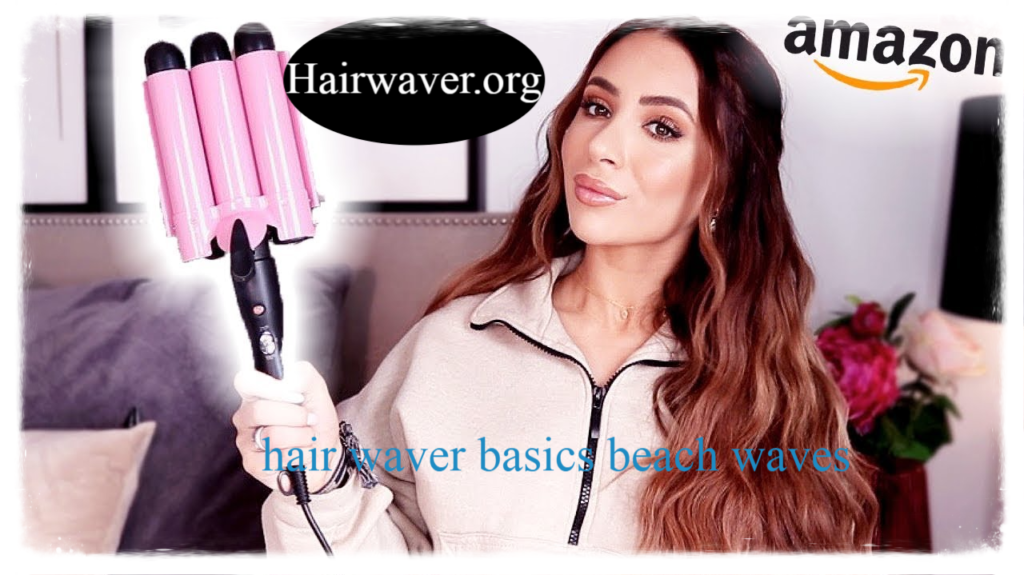
A hair waver is a styling tool designed specifically to create consistent, wave shaped curls rather than tight ringlets. Unlike a traditional curling iron, which uses a cylindrical barrel, a waver typically has a flat or S shaped barrel. This unique shape presses the hair into a zigzag or wave pattern instead of wrapping it into a spiral. hairwaver
Most wavers come with either two or three barrels. The double barrel style creates a looser, more relaxed wave, while the triple barrel version gives you tighter, more defined waves that mimic natural beachy texture.
The whole point of this tool is convenience. You clamp sections of hair, hold for a few seconds, and release. There is no wrapping or twisting involved like there is with a curling wand.
How Do You Use a Hair Waver
Using a hair waver is genuinely simple once you understand the basic motion. Here is a straightforward process to follow.
- Start with clean, dry hair. Wet or damp hair will not hold heat styling properly.
- Divide your hair into sections. Smaller sections give more defined waves, while larger sections create a softer look.
- Clamp a section of hair between the plates, close to the roots but not touching your scalp.
- Hold for about eight to ten seconds depending on your hair type.
- Release and move down to the next section, slightly overlapping where the previous wave ended.
- Continue through your entire head, alternating direction with each section for a more natural finish.
- Once cool, run your fingers through the waves or gently brush them out for a softer effect.
That is really all there is to it. The key is consistency in timing and section size so your waves look uniform.
Can Beginners Use a Hair Waver
Absolutely. In fact, a hair waver is often considered easier to use than a traditional curling wand because there is no wrist twisting technique to master. You simply clamp and hold, which makes it far more forgiving for shaky hands or first time users.
If you are new to heat styling, here are a few beginner friendly tips.
Practice on a lower heat setting first so you get comfortable with timing.
Work in front of a mirror with good lighting so you can see each section clearly.
Do not rush. Rushing is the most common reason beginners end up with uneven waves.
I remember the first time I tried a waver, I was convinced I would end up with a chunk of hair shaped like a crimped mess. It took maybe two tries to get the hang of it, and now it is a five minute part of my morning routine.
Does a Hair Waver Damage Hair
This is one of the most common concerns, and it is a fair one. Any heat styling tool has the potential to cause damage if used incorrectly. However, a hair waver itself is not inherently more damaging than a flat iron or curling wand.
The real risk factors are heat level, frequency of use, and whether you protect your hair beforehand. Here is how to minimize damage.
Always use a heat protectant spray before styling.
Avoid using the highest heat setting unless your hair genuinely requires it.
Give your hair breaks between styling sessions when possible.
Deep condition regularly to replenish moisture lost from heat exposure.
Research on thermal styling consistently shows that heat protectant products can significantly reduce moisture loss and cuticle damage. So while no heat tool is completely risk free, using a waver responsibly should not cause noticeable harm. hairwaver
How Long Do Beach Waves Last
This depends heavily on your hair type, texture, and the products you use. On average, beach waves created with a hair waver last anywhere from one to three days.
Fine hair tends to lose waves faster, sometimes within a day, simply because the hair shaft is lighter and holds shape less easily. Thicker or coarser hair often holds waves for two to three days with minimal touch up needed.
To extend the life of your waves, try these tricks.
Sleep with a loose braid to preserve texture overnight.
Use a lightweight texturizing spray to refresh waves without adding heat.
Avoid brushing waves out completely, since brushing tends to loosen the pattern quickly.
Key Benefits of Using a Hair Waver
There is a reason this tool has become a staple in so many beauty routines. Here are the standout benefits.
Quick styling time compared to other curling methods.
Beginner friendly design with no twisting technique required.
Versatile results ranging from subtle texture to full glam waves.
Works well on most hair lengths, especially shoulder length and longer.
Creates natural looking movement rather than uniform curls.
Hair Waver vs Curling Wand: Which Is Better
This is a question a lot of people ask before buying their first heat tool. The honest answer is that it depends on the look you want.
A curling wand wraps hair around a barrel, producing smooth, uniform spiral curls. It gives you more control over curl tightness but requires practice to master the wrist rotation. hairwaver
A hair waver, on the other hand, clamps hair into a wave pattern with almost no learning curve. It tends to produce a more relaxed, undone look that fits the beach wave aesthetic perfectly.
If you want polished ringlets, a wand may serve you better. If you want effortless, natural looking texture with minimal effort, a waver usually wins.
Best Hair Wavers for Different Hair Types
Not every waver works the same way on every head of hair. Choosing the right one can make a noticeable difference in your results.
Fine or thin hair does well with a smaller barrel size and lower heat range, since fine strands hold shape quickly and do not need excessive heat. source: Merrick’s Art
Thick or coarse hair benefits from a larger barrel and higher heat setting, since thicker strands need more heat penetration to hold a lasting wave.
Short hair pairs well with a compact waver that has a shorter plate length, making it easier to maneuver close to the roots.
Long hair works best with a waver that has a longer barrel, allowing you to style bigger sections at once and cut down on styling time.
Common Mistakes to Avoid With a Hair Waver
Even a simple tool comes with a few common pitfalls. Avoiding these will save you time and frustration.
Skipping heat protectant, which increases the risk of dryness and split ends over time.
Using sections that are too large, which leads to uneven or loose waves that fall out quickly.
Holding the plates closed for too long, which can create a crimped look instead of a soft wave.
Styling hair while it is still damp, which can cause hair to steam and become damaged.
Rushing through sections without letting each one cool before moving on.
Slowing down and following a consistent rhythm makes a bigger difference than people expect.
Hair Preparation Checklist
Before you even plug in your waver, a little prep goes a long way. Follow this quick checklist for the best results.
Wash and fully dry your hair, since damp strands will not hold waves.
Apply a heat protectant spray evenly through the lengths.
Brush out any tangles so sections separate smoothly.
Section your hair into four to six parts for easier handling.
Have clips or ties ready to keep unused sections out of the way.
Recommended Heat Settings by Hair Type
Not all hair reacts to heat the same way, so adjusting your settings matters. Here is a general guide.
Fine or damaged hair should use 250 to 300 degrees Fahrenheit.
Medium or normal hair typically does well at 300 to 350 degrees Fahrenheit.
Thick or coarse hair usually needs 350 to 380 degrees Fahrenheit to hold a lasting wave.
Starting lower and increasing only if needed is always the safer approach.
Step by Step Beach Wave Process Recap
To summarize the styling process in one clear list. source: An Indigo Day
Prep with heat protectant on dry hair.
Section hair into manageable parts.
Clamp small sections near the roots.
Hold for eight to ten seconds.
Release and repeat down the head.
Let waves cool before touching.
Finish with a light texturizing spray.
Products That Help Waves Last Longer
The right products can make the difference between waves that fade by lunchtime and waves that hold through the evening.
A lightweight sea salt spray adds texture and grip without weighing hair down.
A flexible hold hairspray keeps waves bouncy instead of stiff or crunchy.
A dry shampoo applied at the roots before styling gives hair extra grip for the waver to hold onto.
A silk pillowcase reduces friction overnight, helping waves survive until morning.
Using even one or two of these consistently can noticeably extend how long your waves hold shape.
Conclusion
Getting comfortable with hair waver basics beach waves really comes down to practice, patience, and understanding your own hair type. Once you know your ideal heat setting and section size, the whole process becomes second nature. Beach waves offer that relaxed, lived in look without requiring hours at a salon chair.
So next time you are getting ready for a night out or just want a little extra texture for the day, grab your waver and give it a try. Have you used a hair waver before? Share your favorite tips or questions in the comments, and pass this along to a friend who is still curling the old fashioned way.
FAQs
Is a hair waver the same as a curling iron?
No, a waver creates a zigzag wave pattern using flat plates, while a curling iron wraps hair around a barrel to form spiral curls.
Can I use a hair waver on short hair?
Yes, though shoulder length or longer hair typically shows the wave pattern more clearly.
Should I use a waver on wet hair?
No, always style on fully dry hair to avoid damage and steam burns.
How often can I safely use a hair waver?
Using it two to three times per week with heat protectant is generally considered safe for most hair types.
Do I need special products for beach waves?
A heat protectant and a texturizing spray are usually enough to create and maintain the look.
Author Bio: Awais Ali a beauty and lifestyle contributor passionate about simple, everyday hairstyling solutions. With years of hands on experience testing styling tools, the author enjoys breaking down beauty routines into practical, easy to follow steps for readers at every skill level.
email: johanharwen@314gmail.com
Author Name: Awais Ali
