Introduction
Want beautiful beach waves without spending an hour at the salon? You can create soft, relaxed waves at home even if you have never used a curling iron before. Beach waves beginners can follow a few simple techniques to get natural looking texture without making the hair look overly styled.
The best part is that you do not need expensive equipment or professional skills. You can use a curling wand, flat iron, hair straightener, or even heatless methods. The right technique depends on your hair length, thickness, texture, and the finish you want.
In this guide, you will learn how to create beach waves step by step, which tools work best, how to avoid common mistakes, and how to make your waves last longer. You will also find practical temperature guidance, product suggestions, styling tips, and answers to common questions.
What Are Beach Waves?
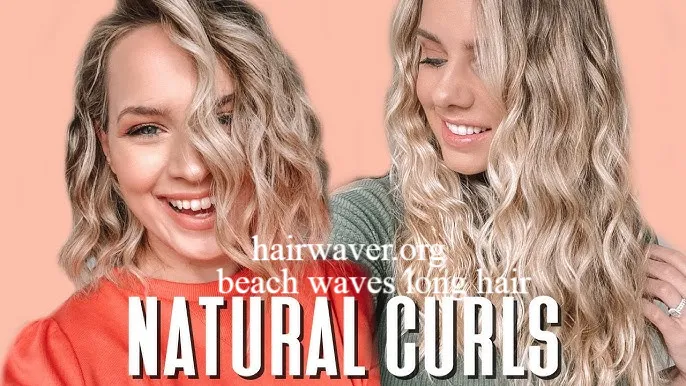
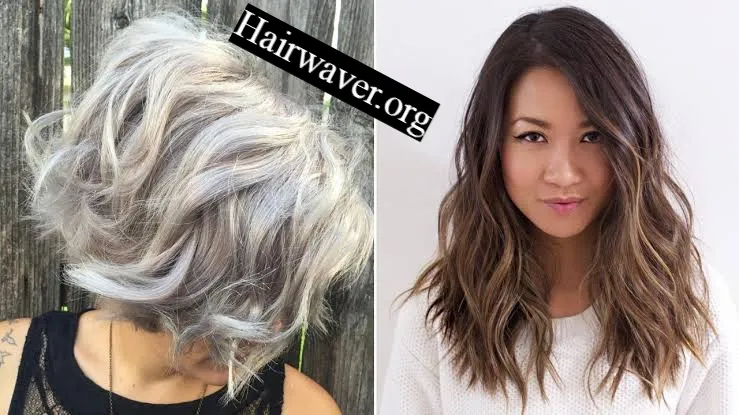
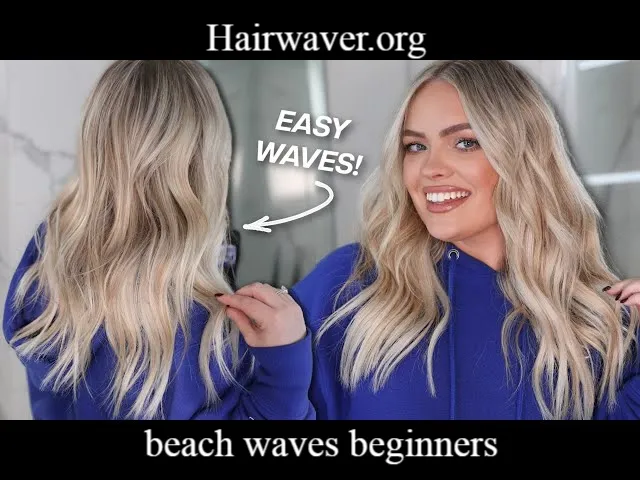
Beach waves are loose, relaxed waves that create a textured and slightly undone hairstyle. Unlike tight curls, they usually have a softer shape and more movement.
The goal is not perfect symmetry. In fact, slightly different waves often create a more natural finish.
Beach waves work especially well for:
• Short hair
• Medium length hair
• Long hair
• Fine hair
• Thick hair
• Straight hair
• Naturally wavy hair
For beach waves beginners, the most important rule is to avoid wrapping every section in exactly the same way. Small variations make the final style look more effortless.
How Do You Create Beach Waves for Beginners?
The easiest method uses a curling wand or curling iron. Start with completely dry hair and divide it into manageable sections.
Step 1: Prepare Your Hair
Begin with clean, dry hair or hair that has been washed several hours earlier.
Apply a heat protectant before using any hot tool. A lightweight styling spray can also add texture without making the hair feel heavy.
Brush through your hair gently to remove tangles.
Step 2: Divide Your Hair
Separate your hair into two or three main sections.
Work with smaller sections if you have thick hair. Use larger sections if your hair is fine and you want softer waves.
You do not need perfect sectioning. The goal is simply to make the styling process easier. source: Popsugar
Step 3: Wrap the Hair
Take a section about one inch wide and wrap it around the curling wand.
Leave the last inch or two of the hair out of the tool. This small detail creates a more relaxed appearance.
Hold the hair briefly, then release it.
Allow the wave to cool before touching it.
Step 4: Change the Direction
Alternate the direction of each wave.
Curl one section away from your face. Curl the next section toward your face.
Continue this pattern throughout your hair.
This technique prevents the waves from joining into one large curl pattern.
Step 5: Break Up the Waves
Once your entire head has cooled, gently run your fingers through the waves.
Do not brush aggressively.
Use your fingers to separate the curls and create movement.
Finish with a lightweight texture spray or flexible hairspray if you need additional hold.
What Temperature Should Beginners Use?
Heat settings matter because excessive heat can make hair dry, brittle, and more prone to breakage.
A practical starting range is around 300°F to 350°F for many hair types. Fine or damaged hair generally needs a lower temperature, while thick and resistant hair may require more heat.
| Hair Type | Suggested Starting Range |
|---|---|
| Fine hair | 250°F to 300°F |
| Normal hair | 300°F to 350°F |
| Thick hair | 325°F to 375°F |
| Coarse hair | 350°F to 390°F |
These ranges are starting points rather than strict rules. Your tool, hair condition, and styling product can change the ideal temperature.
Professional styling brands such as GHD, T3, Dyson, and BaBylissPRO offer tools with adjustable or controlled heat settings. The most important feature for a beginner is not maximum heat. It is having enough control to use the lowest effective temperature.
Which Tool Is Best for Beach Waves Beginners?
Different tools produce different results. Choosing the right one can make learning much easier.
Curling Wand
A curling wand creates loose waves quickly and gives you good control over the size of each wave.
It works particularly well for medium and long hair.
Curling Iron
A curling iron with a clamp can feel easier for beginners because the clamp holds the hair in place.
A larger barrel usually creates softer waves. source: An Indigo Day
Flat Iron
A flat iron can create surprisingly beautiful beach waves.
Twist the iron gently while moving it down the hair. Practice on a small section first because the movement requires some coordination.
Heatless Methods
Heatless waves are useful when you want to reduce heat exposure.
You can braid slightly damp hair before sleeping and release the braids in the morning. You can also use a soft robe belt or heatless curling band.
The result depends heavily on your hair texture and how long you leave the hair wrapped.
How Long Do Beach Waves Last?
Beach waves commonly last several hours, but the exact duration depends on your hair type and styling routine.
Fine, very straight hair may lose its shape faster. Naturally wavy or textured hair may hold the style longer.
Several factors affect longevity:
• Hair thickness
• Natural texture
• Humidity
• Product choice
• Tool temperature
• Wave size
• How much you touch your hair
For beach waves beginners, one of the simplest tricks is to let each wave cool completely before separating it. Hair temporarily holds its new shape better as it cools.
How Can You Make Beach Waves Last Longer?
If your waves disappear quickly, the problem may not be your technique.
Try these practical changes.
Start With Lightly Textured Hair
Extremely clean and silky hair can sometimes struggle to hold a wave.
A small amount of mousse or texture spray can provide extra grip.
Avoid Heavy Products
Heavy oils and thick creams can weigh down waves.
Use lightweight products when possible.
Let Waves Cool
Do not immediately brush or run your hands through freshly curled hair.
Give the waves time to cool first.
Use Flexible Hairspray
A flexible hairspray can provide hold while keeping the hairstyle touchable.
You want movement rather than a stiff, frozen finish.
Common Beach Wave Mistakes Beginners Make
Learning beach waves beginners techniques becomes easier when you know what to avoid.
Using Too Much Heat
Higher heat does not automatically create better waves.
Excessive heat can increase the risk of dryness and damage.
Holding the Tool Too Long
Keeping a hot tool on one section for too long can create a tight curl or unnecessary heat exposure.
Work efficiently and release the hair once it has formed.
Curling Every Section the Same Way
Perfectly identical curls can make the hairstyle look formal.
Alternate directions and vary the section sizes slightly.
Curling the Ends
Leaving some of the ends straight creates the relaxed finish associated with beach waves.
Touching the Hair Too Soon
Freshly styled hair needs time to cool.
Wait before separating the waves.
Beach Waves for Different Hair Types
Your hair type changes the best approach.
Fine Hair
Use smaller sections and lightweight styling products.
Avoid heavy oils before styling because they can make fine hair look flat.
Thick Hair
Divide your hair into more sections.
You may need slightly more heat or additional passes, but avoid repeatedly heating the same section.
Short Hair
Use a smaller barrel or narrow flat iron.
Short hair benefits from smaller sections because they provide better control.
Long Hair
A larger barrel can create softer waves.
Leave the ends slightly straighter for a relaxed appearance.
Naturally Wavy Hair
You may not need a hot tool at all.
Enhance your natural texture with mousse or sea salt spray and allow your hair to dry naturally.
Beach Waves Compared With Other Styles
| Hairstyle | Shape | Finish | Difficulty |
|---|---|---|---|
| Beach waves | Loose waves | Relaxed | Easy |
| Classic curls | Defined curls | Polished | Medium |
| Hollywood waves | Structured waves | Glamorous | Advanced |
| Heatless waves | Soft waves | Natural | Easy |
| Straight hair | No wave | Sleek | Easy |
Beach waves are popular because they sit between completely straight hair and defined curls.
They give your hairstyle movement without requiring perfect technique.
A Simple Beginner Routine
If you are completely new to styling, follow this routine.
- Wash and completely dry your hair.
- Apply heat protectant.
- Divide your hair into manageable sections.
- Choose a moderate heat setting.
- Curl one inch sections.
- Leave the ends slightly straight.
- Alternate the curling direction.
- Let the waves cool.
- Separate them gently with your fingers.
- Finish with flexible hairspray or texture spray.
This simple process makes beach waves beginners can achieve at home much less intimidating.
Expert Tips for Better Results
Professional hairstylists generally emphasize control rather than excessive heat when creating textured styles.
A useful professional approach is to focus on three things: preparation, consistency, and cooling time.
You should also consider the condition of your hair before styling. If your hair feels unusually dry or brittle, reduce heat styling and focus on conditioning.
My favorite beginner tip is simple: do not try to make every wave perfect. Beach waves look better when they have natural variation.
Quick Beach Waves Checklist
Before you start, make sure you have:
• Completely dry hair
• Heat protectant
• Curling wand, curling iron, or flat iron
• Hair clips
• Lightweight texture spray
• Flexible hairspray
• A brush or wide tooth comb
You do not need every product on the list. Start with the basics and add products only when you understand what your hair needs.
Conclusion
Creating beach waves beginners can learn does not have to be complicated. Start with dry hair, protect it from heat, work with manageable sections, and leave the ends slightly straight.
Remember to alternate the direction of your waves and let them cool before separating them. Your first attempt may not look perfect, and that is completely fine.
The relaxed appearance is actually part of the style. With a little practice, you will learn how your hair responds to different tools, temperatures, and products.
Try the technique on a small section first, then adjust the process based on your hair type. Once you find your ideal routine, creating soft beach waves can become one of the easiest hairstyles in your beauty routine.
Frequently Asked Questions
How do beginners make beach waves?
Beginners can use a curling wand, curling iron, or flat iron. Work with small sections, leave the ends straight, alternate directions, and gently separate the waves after they cool.
Are beach waves easy to do?
Yes. Beach waves are one of the more beginner friendly textured hairstyles because they do not require perfectly shaped curls.
Should you curl your hair toward or away from your face?
Both directions can work. Alternating the direction creates a more natural and textured result.
Should beach waves have straight ends?
Yes. Leaving the final inch or two slightly straight can create the relaxed look associated with beach waves.
What size curling iron is best for beach waves?
A medium to large barrel can create soft waves. The best size depends on your hair length and the wave pattern you want.
How do you make beach waves stay all day?
Use heat protectant, lightweight texture products, allow the waves to cool, avoid excessive touching, and finish with flexible hairspray.
Can you create beach waves without heat?
Yes. Braids, heatless curling bands, and other overnight techniques can create waves without using a hot tool.
Are beach waves suitable for short hair?
Yes. Short hair can look excellent with beach waves. Use smaller sections and a smaller styling tool for better control.
How often can you style beach waves?
There is no single schedule that works for everyone. Frequent heat styling can contribute to dryness and damage, so use heat protection and choose lower effective temperatures whenever possible.
Author Bio: Beauty and Hair Care Writer A passionate beauty content writer focused on practical hair care, styling techniques, and beginner friendly beauty advice. The author creates easy to understand guides that help readers choose suitable tools, products, and techniques for everyday styling.
email: johanharwen@314gmail.com
Author Name: Beauty and Hair Care Writer