
Introduction
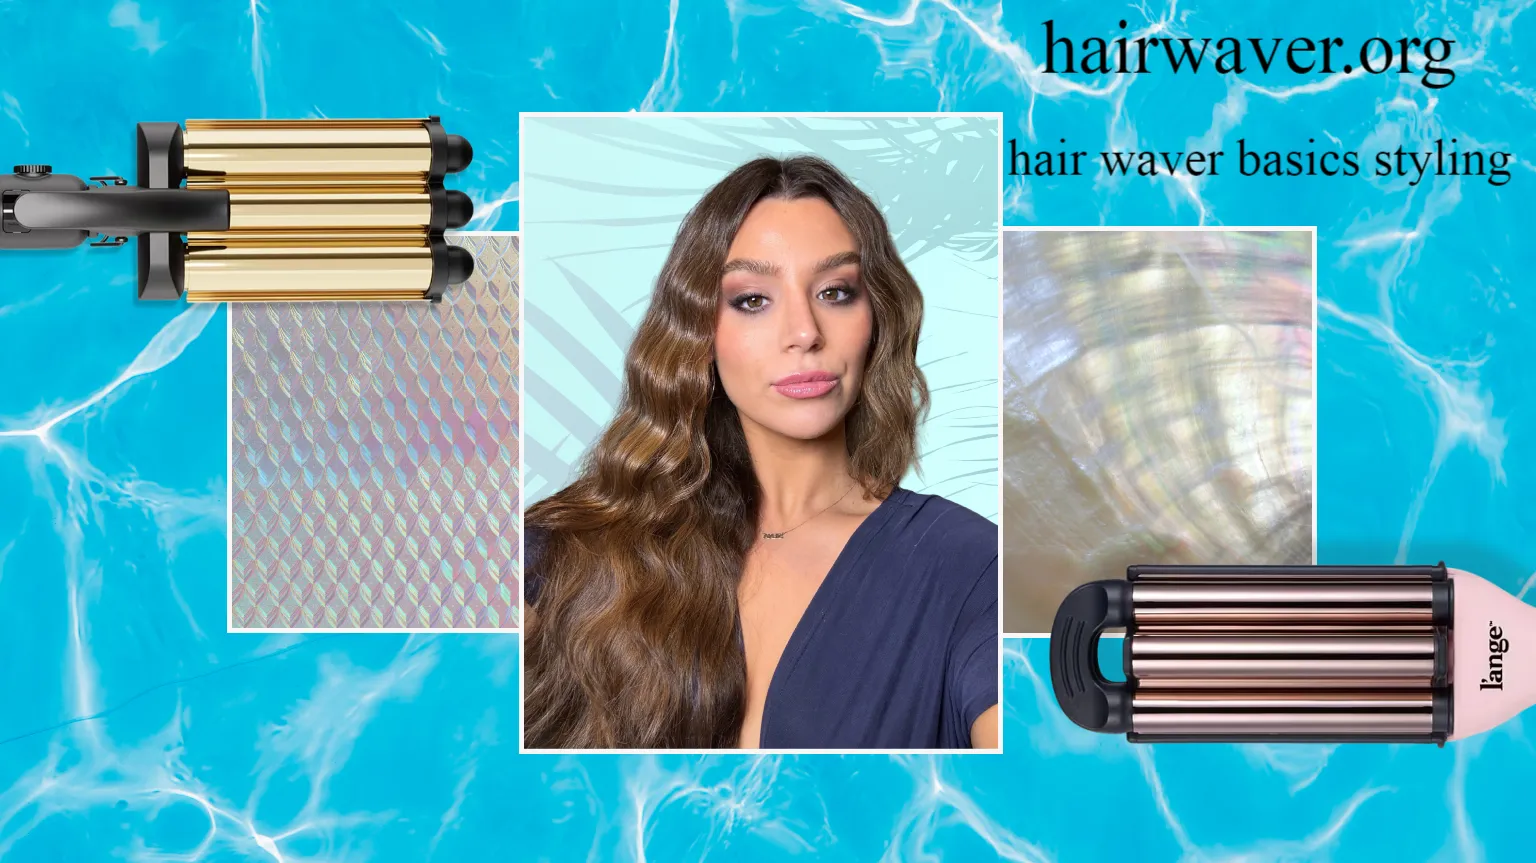
Picture this. You scroll through your feed and see someone with effortless, beachy waves that look like they just stepped off a yacht. You wonder how on earth they got their hair to look like that without spending three hours at a salon. The answer is almost always a hair waver, and it is simpler to use than you might think.
Understanding hair waver basics styling is the first step toward getting those gorgeous waves at home. Whether you are a complete beginner or someone who has been using heat tools for years but never quite nailed the technique, this article is going to walk you through everything. You will learn what a hair waver actually is, how to use it step by step, which temperature settings work for your hair type, whether it is safe for daily use, and how it stacks up against other popular heat tools. Let us get into it.
What Is a Hair Waver? A Clear Definition
A hair waver is a heat styling tool that uses multiple connected barrels, typically two or three, to press sections of hair into a wave pattern. Unlike a curling iron that creates a spiral curl, a waver creates that relaxed, undone wave texture that looks naturally sun-kissed.
Most hair wavers heat up to temperatures ranging from 180 to 450 degrees Fahrenheit. They come in different barrel sizes. Smaller barrels, around one inch or less, produce tighter, more defined waves. Larger barrels, closer to one and a half to two inches, create soft, loose waves. The tool is designed to be simple. You clamp it down on a section of hair, hold for a few seconds, release, and move to the next section.
That is really all there is to the basic motion. The results, however, can look incredibly polished.
Hair Waver vs Curling Iron vs Flat Iron: What Is the Difference?
Before you dive into styling, it helps to know how a waver compares to the tools you might already own. hairwaver
Hair Waver
A hair waver creates waves with a natural, beachy feel. It is designed specifically for that undone texture. The multi-barrel design means you get a consistent pattern throughout the hair with very little technique required. It is one of the most beginner-friendly heat tools available.
Curling Iron
A curling iron wraps hair around a single barrel to create defined curls or ringlets. The curl tightness depends on the barrel size. It gives you more control over the shape of each curl, but it takes more practice to get an even result. Curls from a curling iron tend to look more polished and formal compared to waver waves. source: BuzzFeed
Flat Iron
A flat iron is primarily a straightening tool, but with the right technique, you can use it to create loose waves by twisting sections as you glide the iron down the hair. This method takes more skill and practice. Flat iron waves tend to have a different shape than waver waves and can sometimes look more angular than soft.
The bottom line: If your goal is soft, effortless waves with minimal technique, a hair waver is your best tool. Curling irons offer more curl definition, and flat irons are more versatile but harder to wave with.
How Do You Use a Hair Waver? Step-by-Step Instructions
Using a hair waver is one of the easier skills to pick up in hair styling. Here is a straightforward process that works for most hair types.
Step 1: Start with clean, dry hair. Always begin with fully dry hair. Applying heat to damp hair can cause significant damage. Use a heat protectant spray or serum before you start. This step matters more than people realize.
Step 2: Section your hair. Divide your hair into manageable sections. Start from the bottom layer and clip the rest up. Working in sections ensures every part of your hair gets even coverage and the waves look uniform.
Step 3: Heat your waver to the right temperature. Check the temperature guide in the next section to choose the right heat for your hair type. Most people do well somewhere between 300 and 380 degrees Fahrenheit.
Step 4: Clamp the waver at the mid-shaft. Do not start right at the root. Begin a couple of inches away from the scalp. This gives you a more natural look and protects the most delicate part of your hair near the roots.
Step 5: Hold and release. Hold the clamp closed for about five to eight seconds, then gently open and slide the waver down slightly before clamping again. Continue this motion until you reach the ends. Do not clamp all the way to the very tip, as this can cause a kink at the ends.
Step 6: Let waves cool before touching. This is a step most beginners skip. Letting the waves cool completely before running your fingers through them helps them hold their shape much longer.
Step 7: Finish with a light-hold product. A texturizing spray or a small amount of flexible hold hairspray keeps the waves in place without making them stiff or crunchy.
What Temperature Should You Use for Your Hair Type?
Temperature is one of the most important parts of hair waver basics styling. Using the wrong heat for your hair can lead to frizz, breakage, or waves that fall flat within an hour.
Fine or Damaged Hair
Keep your temperature between 250 and 300 degrees Fahrenheit. Fine hair is more vulnerable to heat damage and does not need high temperatures to wave. Lower heat also helps the style last longer on finer strands.
Normal or Medium Hair
A range of 300 to 350 degrees Fahrenheit works well for most people with average hair thickness and density. This is a sweet spot that delivers long-lasting waves without excessive heat exposure. source: Merrick’s Art
Thick or Coarse Hair
Thick hair can handle and often requires higher temperatures. Use settings between 370 and 410 degrees Fahrenheit. If your waves fall out within an hour at lower temps, bumping up the heat slightly usually solves the problem.
Color-Treated or Chemically Processed Hair
Stay on the lower end regardless of thickness. Color-treated hair has a compromised cuticle, which makes it more susceptible to heat damage. Stick to 275 to 320 degrees and always use a quality heat protectant.
Is a Hair Waver Safe for Daily Use?
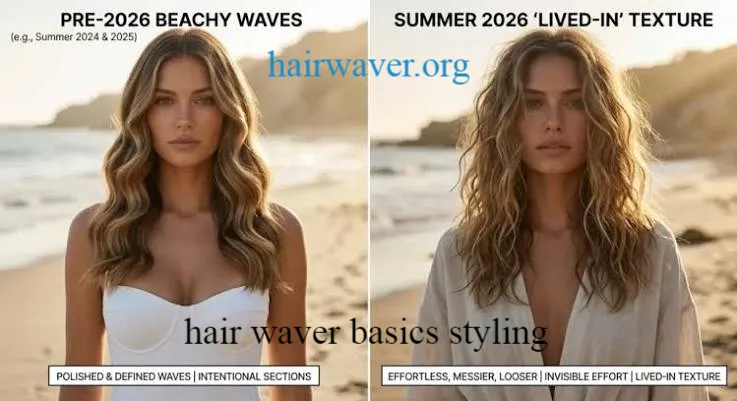
This is a common and very valid concern. The honest answer is that daily heat styling carries some risk for every hair type, but it does not have to cause damage if you are smart about it.
Studies from hair care research consistently show that heat above 300 degrees Fahrenheit begins to affect the protein structure of the hair. The key is minimizing cumulative damage rather than avoiding the tool altogether.
Here is what the experts recommend for daily or near-daily waver use: hairwaver
Never skip heat protectant. This single product reduces heat-related damage significantly. Use the lowest effective temperature for your hair type. Give your hair one or two heat-free days each week. Deep condition or use a moisturizing mask once a week to replenish moisture. Trim ends every six to eight weeks to prevent split ends from traveling up the shaft.
I always tell people to think of heat tools like exercise. A little every day is fine and even beneficial, but only if you are also taking care of recovery. The recovery for your hair is moisture, protection, and occasional rest.
Can Beginners Use a Hair Waver?
Absolutely. In fact, a hair waver is often recommended as one of the best starter tools for people new to heat styling. The technique is repetitive and easy to learn. You are essentially doing the same clamping and releasing motion across every section of hair.
The most common beginner mistakes are easy to avoid once you know about them:
Starting too close to the roots and burning the scalp. Holding the tool for too long on one section and creating a crease instead of a wave. Touching the waves immediately after releasing the tool. Forgetting to use a heat protectant. Using sections that are too thick, which leads to uneven results.
If you practice on a few sections before doing your full head, you will get a feel for the timing and pressure within a session or two.
Expert Styling Tips for Better Waves
These are the kinds of tips you pick up after years of experience, but you do not have to wait that long to use them.
Alternate the direction of your waves. Clamp forward on one section, then slightly angle backward on the next. This creates a more natural, multidimensional look rather than uniform waves going all in one direction.
Use slightly smaller sections for more definition. The thinner the section, the more pronounced and long-lasting the wave. Thicker sections create softer, more subtle waves.
Try the cool shot trick. Some people mist their waves with a light hairspray while the wave is still warm, then let it set. This helps lock in the shape as the hair cools.
Work from the back to the front. Starting at the back means the first sections you style have more time to cool and set before you are finished with the rest.
Apply a small amount of oil after styling. A few drops of argan or marula oil on your palms, smoothed over the finished waves, adds shine and reduces frizz without weighing the hair down.
Best Practices Checklist for Hair Waver Styling
Use this as a quick reference every time you style:
Always start with completely dry hair. Apply heat protectant before using any heat tool. Section hair into manageable layers before styling. Use the correct temperature for your specific hair type. Start the waver two inches away from the root. Hold each section for five to eight seconds. Release and let waves cool before touching. Finish with a texturizing or light-hold spray. Store your waver safely after each use. Give your hair at least one rest day from heat per week.
Conclusion
Getting beautiful waves at home is completely achievable once you understand the basics. Hair waver basics styling comes down to a few key things: knowing how your tool works, using the right temperature for your hair, following a simple step-by-step process, and giving your hair a little post-styling care.
Whether you have fine, thick, color-treated, or totally untouched hair, there is a technique and a heat setting that works for you. Beginners will find the learning curve is much shorter than with other tools, and experienced stylists will find plenty of room to refine and experiment.
Now it is your turn. Have you tried a hair waver before, or is this going to be your first time? Share your experience or drop a question, and feel free to pass this guide along to a friend who is still struggling to get those waves just right.
Frequently Asked Questions
1. What is a hair waver in simple terms? A hair waver is a heat styling tool with two or more barrels that press hair into a wave pattern. It creates soft, beachy waves without the skill required for a curling iron.
2. How long should I hold a hair waver on each section? Hold the waver closed on each section for about five to eight seconds. Thicker hair may need a second or two longer. Fine hair needs less time to set.
3. Can I use a hair waver on extensions? Yes, but check the extension type first. Human hair extensions handle heat just like natural hair. Synthetic extensions often cannot tolerate high heat and may melt or become damaged.
4. Do I need to use a heat protectant with a hair waver? Yes, every single time. Heat protectants significantly reduce the damage caused by high temperatures and help the style last longer as well.
5. Why do my waves fall out quickly? The most common reasons are using too low a temperature, touching the waves before they cool, or using sections that are too thick. Try smaller sections, a slightly higher heat setting, and wait until the waves are fully cooled before styling further.
6. Is a hair waver better than a curling iron for beginners? Most beginners find a hair waver easier to use. The technique is more repetitive and forgiving compared to wrapping hair around a curling iron barrel.
7. Can I use a hair waver on short hair? Yes. Most wavers work well on hair that is at least four to five inches long. For very short hair, look for a waver with narrower, more compact barrels.
8. How do I make my waver waves last all day? Start with a volumizing mousse before styling. Let waves cool fully before touching. Finish with a flexible hold hairspray. Avoid touching your hair excessively throughout the day.
9. What is the difference between a two-barrel and three-barrel waver? A two-barrel waver creates fewer, larger waves with a softer look. A three-barrel waver produces more defined, tighter waves with a clearer S-shaped pattern.
10. Can I use a hair waver on wet hair? No. Always style on completely dry hair. Heat applied to wet hair causes the water inside the hair shaft to expand rapidly, which leads to breakage and serious damage.
Author Bio: Mara Ellison is a beauty and lifestyle writer with over a decade of experience covering hair care, styling tools, and beauty trends for both print and digital platforms. She has worked alongside professional stylists and brand educators to bring accurate, real-world advice to everyday readers. Mara is passionate about making professional-level styling accessible to everyone, no salon chair required.
email: johanharwen@314gmail.com
Author Name: Mara Ellison
