
Introduction
You are about to board a flight. Your suitcase is packed. But somewhere between the excitement of travel and the reality of limited luggage space, you realize your beloved hair waver is sitting at home. Sound familiar? Traveling without your styling tools feels like traveling without your confidence.
Hair waver basics travel is one of those topics that every beauty lover eventually needs to master. Whether you are a weekend explorer or a full-time digital nomad, knowing how to wave your hair on the go changes everything. You do not have to choose between great hair and light luggage.
This guide covers everything you need to know about traveling with a hair waver. You will learn what to look for in a travel-friendly waver, how to use it safely abroad, packing tips that save space, and simple techniques for creating gorgeous waves no matter where you are. By the end, you will feel fully prepared to keep your hair looking amazing on every trip.
What Is a Hair Waver and Why Does It Matter for Travel?
Understanding the Basics
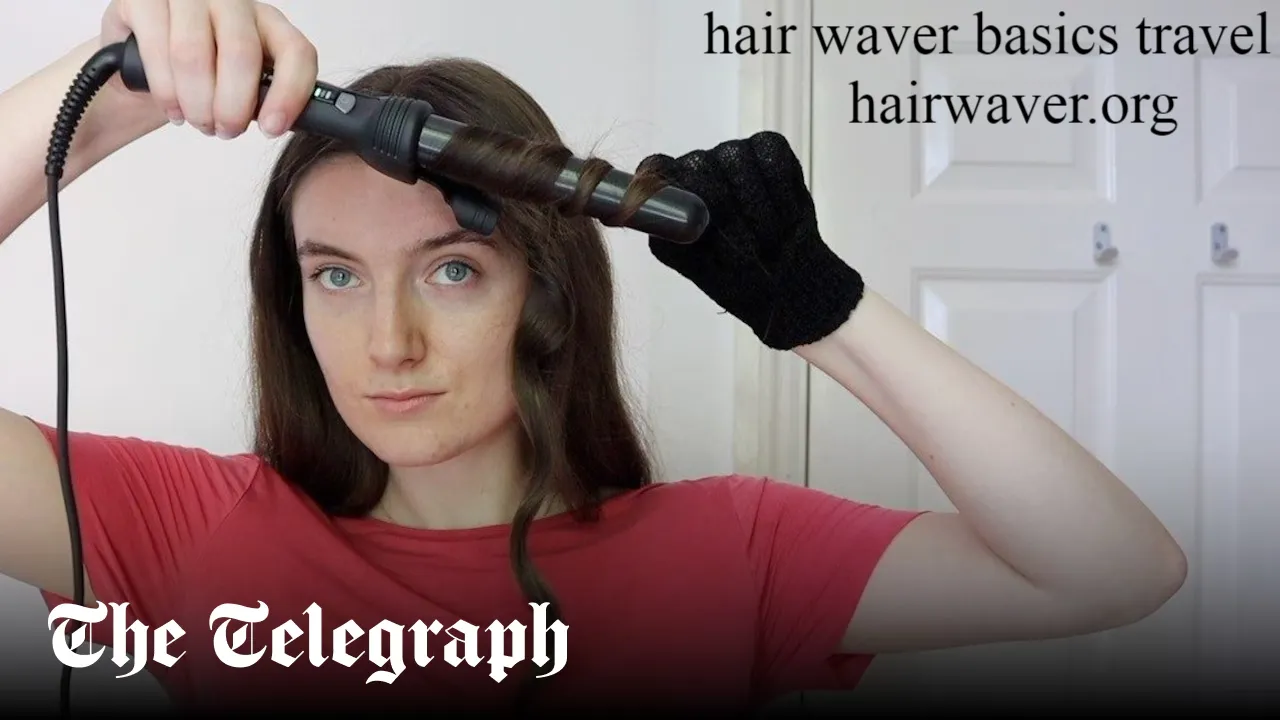
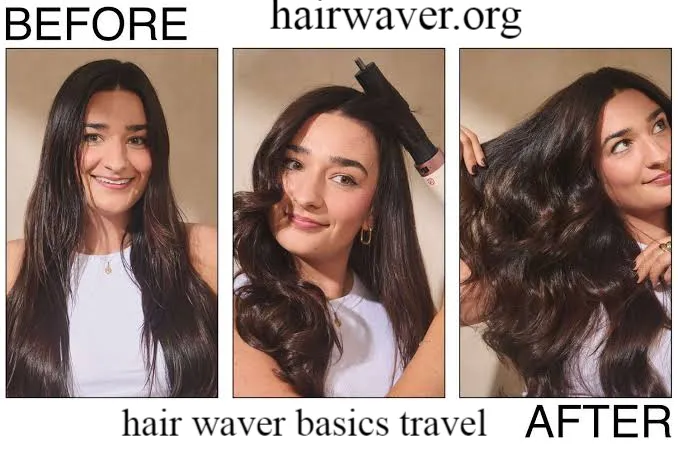
A hair waver is a styling tool that creates defined S-shaped waves in your hair. Unlike a curling iron, which creates tight curls, a waver produces a softer, beach wave look that feels effortless and relaxed. This style works beautifully for casual sightseeing days, dinner outings, and everything in between.
For travelers, a hair waver is particularly appealing because the waves it creates last longer than simple blowouts. This means fewer touch-ups throughout the day. It also means you spend less time in front of the mirror and more time exploring. That alone makes mastering hair waver basics travel completely worth your effort.
Why Travel Hair Styling Is Different
Styling your hair at home is straightforward. You have your full routine, your outlets, and all your products. Travel changes the equation entirely. You deal with different voltage systems, cramped hotel bathrooms, and limited product options. Understanding these differences before you leave home saves you frustration and potential damage to both your hair and your tools. source: Who What Wear
Choosing the Right Travel Hair Waver
Key Features to Look For
Not all hair wavers are built for travel. When you shop with travel in mind, these features should be non-negotiable:
- Dual voltage capability: This is the most critical feature. Dual voltage (100V to 240V) means your waver works in any country without blowing a fuse or burning out the motor.
- Compact size: Look for a waver that folds or fits comfortably in a small bag. Many travel wavers measure under 10 inches.
- Fast heat-up time: A waver that heats in 30 seconds or less saves precious morning time.
- Auto shut-off: This safety feature turns the tool off after 30 to 60 minutes of inactivity. It protects your luggage and hotel room while you finish getting dressed.
- Heat-resistant pouch included: Many travel wavers come with a storage pouch you can pack immediately after use.
The Size Debate: Mini vs Full Size
Mini wavers are incredibly portable but work best for short to medium length hair. A full-size travel waver might feel bulkier but produces more consistent waves across longer hair. I recommend assessing your hair length before choosing. If your hair is below your shoulders, go for a slightly larger barrel. For shorter hair, a mini waver does the job perfectly and takes up almost no space.
Understanding Voltage and Adapter Requirements
Voltage Basics Every Traveler Needs to Know
This is where many travelers make costly mistakes. The United States uses 110 to 120 volts. Most of Europe, Asia, and Australia use 220 to 240 volts. Using a single voltage tool in the wrong country can damage it permanently or create a safety hazard.
A dual voltage hair waver solves this problem completely. You simply check the voltage switch, set it to the correct level, and plug in using a travel adapter. The waver functions exactly as it does at home. No converter needed, just a simple adapter for the outlet shape.
Adapter vs Converter: What You Actually Need
Many travelers confuse adapters and converters. An adapter only changes the plug shape. A converter changes the voltage. If your waver is dual voltage, you only need an adapter. If your waver is single voltage only, you need a converter, which is bulky and often unreliable. The simplest solution is always purchasing a dual voltage tool from the start. source: Instagram · natgeebeauty
Packing Your Hair Waver Smartly
The Carry-On vs Checked Bag Decision
Hair wavers are allowed in both carry-on and checked baggage. However, carry-on is always the safer choice. This way, your tool never gets lost or delayed with your luggage. It also means you have access to it immediately upon arrival, which matters when you land at night and want to freshen up before dinner.
When packing in your carry-on, always allow the waver to cool completely before storing it. Place it in its heat-resistant pouch. Then wrap it in a soft clothing item for extra protection during the flight.
Space-Saving Packing Tips
Getting your waver into a carry-on without sacrificing other essentials requires smart packing strategies:
- Choose a waver that comes with a dual-purpose heat-resistant pouch and travel bag.
- Pack your waver in the center of your bag surrounded by soft clothing for padding.
- Roll your heat-resistant glove flat to save space alongside the waver.
- Bring only a small travel-size heat protectant spray instead of a full-size bottle.
- Use your waver to style your hair on the final day before checking out, allowing hotel supplies to reduce your kit size. hairwaver
Using Your Hair Waver While Traveling
Quick Styling Techniques for Travelers
Creating beautiful waves on the road does not require your full at-home routine. These streamlined steps deliver gorgeous results in under ten minutes:
Step 1: Start with clean or day-two hair. Slightly dirty hair actually holds waves better than freshly washed hair. This works in your favor when traveling light.
Step 2: Apply a small amount of heat protectant to damp or dry hair. Even on travel days, skipping heat protection leads to long-term damage.
Step 3: Section your hair into two or three horizontal layers. Working in sections gives you consistent waves throughout.
Step 4: Clamp the waver at the mid-shaft of your hair. Hold for five to eight seconds depending on your hair thickness. Release and move down or up the section.
Step 5: Let the waves cool completely before touching them. This sets the wave pattern and extends the style’s longevity.
Step 6: Finish with a light hold spray or a small amount of hair oil for shine. Pack a travel-size version of your favorite product.
Hotel-Specific Tips
Hotel bathrooms are not designed for styling sessions. Outlets are often awkwardly placed. Counter space is limited. A few smart habits make the experience much easier. Bring a small suction hook to create extra hanging space for your tools. Use the ironing board if available as extra counter space. Always check the outlet voltage before plugging in, even in familiar countries.
Hair Care on the Road
Protecting Your Hair During Travel
Travel is hard on your hair. Airplane air is extremely dry. Different water quality in different cities can affect how your hair behaves. Climate changes add additional stress. A few simple habits protect your hair during travel so your waves look their best when you style them. hairwaver
Stay hydrated during flights. The dry cabin air dehydrates your scalp and strands simultaneously. Use a travel-size leave-in conditioner after washing your hair in hotels. Consider a silk or satin hair tie to prevent breakage during long travel days.
When to Skip the Waver
Some travel days simply do not call for heat styling. Rainy destinations, beach days, and full outdoor adventure itineraries are all situations where heat-styled waves will not survive anyway. On those days, embrace natural texture, braids, or simple updos. Saving your hair from unnecessary heat during heavy travel days also extends the health of your strands throughout a long trip.
Conclusion
Hair waver basics travel is about more than just packing a tool. It is about choosing the right waver, understanding voltage, packing smartly, and using efficient techniques that deliver beautiful results even in challenging hotel environments.
The right travel hair waver transforms your morning routine on the road. You spend less time worrying about your hair and more time enjoying your destination. Once you develop your travel hair routine, it becomes second nature, just like packing your passport.
Which travel hair tip do you find most helpful? Have you found a favorite compact waver that made your trips easier? Share your experience in the comments or pass this guide along to a friend who loves to travel in style.
FAQs
1. What is the best type of hair waver for travel? Look for a compact, dual voltage waver with auto shut-off and a heat-resistant travel pouch. These features combine safety, convenience, and versatility for international travel.
2. Can I bring a hair waver in my carry-on luggage? Yes. Hair wavers are allowed in carry-on and checked luggage. Carry-on is recommended to avoid loss or delay. Make sure the waver is completely cool and stored safely before boarding.
3. Do I need a voltage converter for my hair waver abroad? Only if your waver is single voltage. Dual voltage wavers only require a plug adapter, not a converter. Always check your tool’s voltage rating before traveling internationally.
4. How do I create long-lasting waves while traveling? Start with day-two hair for better hold. Apply heat protectant before styling. Let waves cool completely before touching them. Finish with a light hold spray to extend the style.
5. What barrel size is best for travel wavers? A 1 to 1.25 inch barrel works well for most hair types. Smaller barrels create tighter waves. Larger barrels create loose, relaxed waves. Choose based on your preferred style.
6. How do I keep my hair healthy while traveling and heat styling? Use heat protectant every time you style. Stay hydrated during flights. Use a travel-size leave-in conditioner. Skip heat styling on days when outdoor activities will affect the style anyway.
7. Can I use a hair waver on wet hair? No. Always style dry or nearly dry hair with a waver. Using heat tools on wet hair causes serious damage including breakage and split ends. Allow hair to air dry or use a travel blow dryer first.
8. How long does a travel waver take to heat up? Most quality travel wavers heat up within 30 to 60 seconds. Some premium models reach optimal temperature in under 30 seconds, which is ideal for quick hotel morning routines.
9. Are mini wavers effective for thick or long hair? Mini wavers work best for fine to medium thickness hair and hair that is shoulder length or shorter. Thick or very long hair benefits from a slightly larger tool for even, consistent waves.
10. What products should I pack alongside my travel waver? Pack a travel-size heat protectant spray, a light hold hairspray, and a small amount of smoothing serum or hair oil. These three products cover heat protection, style hold, and finishing shine.
About the Author : Natalie Rhodes is a beauty editor and travel lifestyle writer with over eight years of experience covering hair care, styling tools, and on-the-go beauty routines. She has traveled to more than 40 countries and developed a deep understanding of what actually works for maintaining beautiful hair while living out of a suitcase. Natalie believes that great hair should never be a reason to leave an adventure behind. When she is not writing, she shares beauty travel tips across her platforms and mentors new beauty writers entering the industry.
email: johanharwen@314gmail.com
Author Name: Natalie Rhodes
