
Introduction
You scroll through Instagram and see those perfect, effortless beach waves. Then you try to recreate them at home and end up with frizzy, uneven results. Sound familiar? Learning Hair Waver Basics Beginners does not have to feel this frustrating.
A hair waver is one of the easiest styling tools to master once you understand the fundamentals. Unlike traditional curling irons that require twisting and wrapping techniques, hair wavers simplify the entire process. You clamp your hair, hold for a few seconds, and release beautiful waves.
This guide covers everything you need to know as a beginner. You will learn what a hair waver actually is, how to use one correctly, whether daily use damages your hair, and how these tools compare to curling irons. By the end, you will feel confident picking up this tool for the first time.
What Is a Hair Waver?
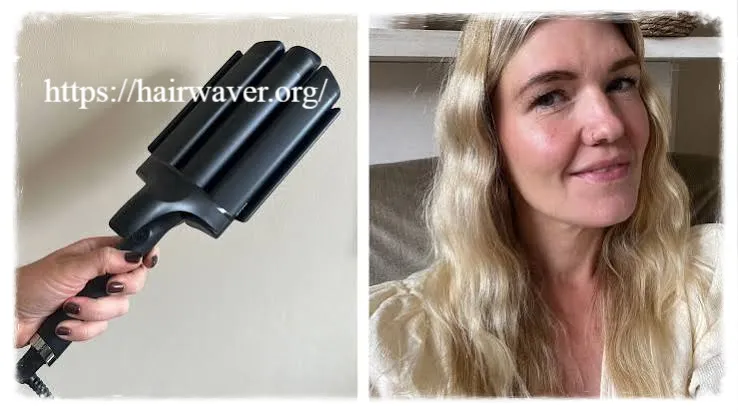
A hair waver is a styling tool that creates loose, natural-looking waves using shaped plates instead of a traditional barrel. The plates come in S-shapes, deep waves, or beach wave patterns. You simply clamp sections of hair between the plates for a few seconds. source: Poor Little It Girl
Unlike curling irons that wrap hair around a cylindrical barrel, wavers press hair between two textured plates. This creates a more relaxed, undone look. Many beginners find wavers easier to use because they eliminate the guesswork of wrapping technique.
The results look effortlessly tousled rather than perfectly curled. This makes hair wavers incredibly popular for casual, everyday styling. You get texture and volume without spending twenty minutes perfecting each curl.
Is a Hair Waver Good for Beginners?
Yes, hair wavers rank among the most beginner-friendly styling tools available. The clamp-and-hold technique requires minimal skill compared to curling irons. You do not need to master wrapping angles or worry about hair falling off the barrel.
I remember my first attempt with a curling iron. My arm cramped trying to hold the wrap in place while my hair kept slipping. Switching to a hair waver completely changed my styling routine. The learning curve felt almost nonexistent.
Beginners appreciate several waver advantages: VISIT…
- Simple clamp technique requires no wrapping skills
- Consistent results even on your first attempt
- Faster styling time compared to traditional curling
- Less risk of uneven curls from inconsistent technique
- Lower learning curve overall
These factors make hair wavers an excellent starting point for anyone new to heat styling.
How Do You Use a Hair Waver Correctly?
Step by Step Instructions
Follow these numbered steps for perfect results every time.
- Start with clean, dry hair. Never use heat tools on wet or damp hair, as this causes serious damage.
- Apply heat protectant spray. Cover all sections thoroughly before applying any heat.
- Section your hair. Divide hair into three to four manageable sections using clips.
- Set the correct temperature. Fine hair needs 300 to 320 degrees. Thick or coarse hair needs 350 to 380 degrees.
- Take a small section. Grab about one to two inches of hair, no wider than the plate itself.
- Clamp the plates shut. Close the waver near your roots, leaving about one inch of space from the scalp.
- Hold for 5 to 8 seconds. Count silently or watch the clock to avoid overheating one section.
- Release and move down. Open the plates, move down the hair shaft, and repeat the clamping motion.
- Continue to the ends. Work your way down each section until you reach the hair tips.
- Let waves cool before touching. Allow each section to cool for a few seconds before running fingers through it.
- Finish with light hairspray. Lock in your waves with a flexible hold spray.
Beginner Friendly Checklist
Use this quick checklist before every styling session. VISIT…
- Hair is completely dry
- Heat protectant applied
- Correct temperature selected for hair type
- Sections are small and manageable
- Waver plates are clean and free of product buildup
- Cooling time factored into your routine
- Finishing spray ready for application
Can I Use a Hair Waver Every Day?
Daily use is technically possible, but most hair experts recommend limiting heat styling to three or four times weekly. Constant heat exposure gradually weakens hair strands, leading to dryness and breakage over time. hairwaver
If you must style daily, always use a heat protectant without exception. Lower your temperature setting slightly to reduce cumulative damage. Give your hair rest days whenever your schedule allows.
Many stylists suggest alternating between heat styling and heat-free methods like braiding overnight or using foam rollers. This approach lets you maintain styled looks while protecting hair health long term.
Does a Hair Waver Damage Hair?
Any heat styling tool carries damage risk, and hair wavers are no exception. However, damage largely depends on your technique, temperature settings, and protective measures rather than the tool itself.
High heat applied without protection breaks down the protein structure in your hair. This leads to split ends, dryness, and brittleness. The good news is that proper technique minimizes these risks significantly.
Follow these damage prevention tips: hairwaver
- Always apply heat protectant before styling
- Choose the lowest effective temperature for your hair type
- Avoid clamping the same section repeatedly
- Never use wavers on wet hair
- Deep condition weekly to restore moisture
- Trim ends regularly to prevent split end progression
With these precautions, you can enjoy beautiful waves while keeping your hair healthy.
Hair Waver vs Curling Iron Comparison
Understanding the differences helps you choose the right tool for your styling goals.
| Feature | Hair Waver | Curling Iron |
|---|---|---|
| Technique | Clamp and hold | Wrap and hold |
| Learning curve | Beginner friendly | Moderate difficulty |
| Styling time | Faster overall | Takes longer per section |
| Result style | Loose, natural waves | Defined, tighter curls |
| Skill required | Minimal | Moderate to advanced |
| Versatility | Limited to wave patterns | Multiple curl styles possible |
| Best for | Beach waves, casual looks | Formal curls, tight ringlets |
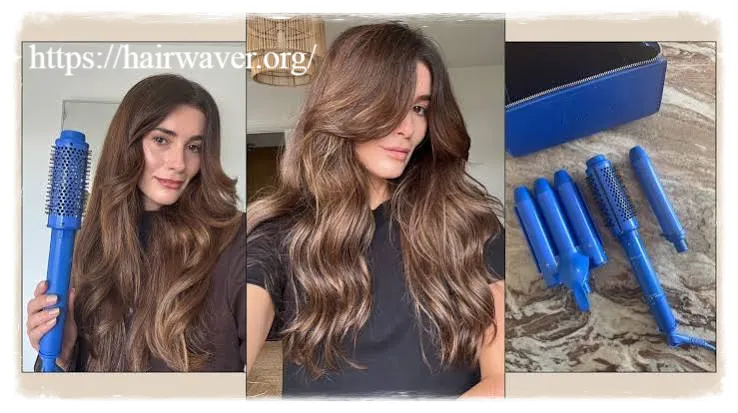
If you want quick, effortless waves, a hair waver suits you perfectly. If you need precise, structured curls for special occasions, a curling iron offers more control.
Ceramic vs Titanium Hair Waver Plates
Plate material significantly affects your styling experience and hair health.
| Feature | Ceramic Plates | Titanium Plates |
|---|---|---|
| Heat distribution | Even and gentle | Extremely fast heating |
| Best for hair type | Fine to medium hair | Thick or coarse hair |
| Damage risk | Lower risk | Higher risk if misused |
| Price range | Generally affordable | Often more expensive |
| Durability | Moderate lifespan | Long lasting |
| Beginner suitability | Highly recommended | Requires more experience |
Beginners typically find ceramic plates more forgiving. The gentler heat distribution reduces the chance of accidental damage while you learn proper technique.
Expert Hair Care Recommendations
Professional stylists consistently emphasize a few core principles for heat styling beginners. Always prioritize heat protection over speed. Rushing through application without protectant spray causes unnecessary damage.
Invest in a quality waver with adjustable temperature settings. Cheap tools often lack consistent heat distribution, forcing you to pass over sections multiple times. This repeated heat exposure damages hair more than a single, properly heated pass.
Stylists also recommend the strand test before full styling. Take one small section and test your chosen temperature first. This prevents disappointing results across your entire head.
Regular trims remain essential regardless of your styling frequency. Even with perfect technique, hair naturally needs maintenance to look its healthiest.
Conclusion
Mastering Hair Waver Basics Beginners for beginners comes down to understanding your tool, protecting your hair, and practicing proper technique. The clamp and hold method makes this styling tool remarkably accessible, even for complete beginners.
Remember to always use heat protectant, choose appropriate temperatures for your hair type, and give your hair rest days when possible. Whether you choose ceramic or titanium plates, prioritizing gentle, informed technique over speed always produces better results.
Ready to try your first waves? Start with the lowest effective temperature, follow the numbered steps above, and be patient with yourself during the learning process. Have you tried a hair waver before? Share your experience or questions in the comments below.
FAQs
1. What temperature should beginners use on a hair waver?
Start at 300 to 320 degrees Fahrenheit for fine hair. Thicker hair can handle 350 to 380 degrees. Always begin lower and increase only if needed.
2. How long should I hold the waver on each section?
Hold each section for 5 to 8 seconds. Holding longer risks damage, while holding too briefly may not create lasting waves.
3. Can I use a hair waver on short hair?
Yes, short hair can be waved successfully. Focus on smaller sections and hold the plates closer to the mid lengths rather than the roots.
4. Why do my waves fall out quickly?
Waves often fall because hair was not fully dry beforehand, or no finishing spray was applied. Ensure completely dry hair and lock waves with hairspray.
5. Should I wash my hair before using a waver?
Second day hair typically holds waves better than freshly washed hair. Freshly washed hair tends to be slippery and may not hold curl as effectively.
also read: hairwaver.org
email: johanharwen@314gmail.com
Author Name: Emma Collins
About the Author : Emma Collins is a licensed cosmetologist with eight years of experience in hair styling and heat tool education. She specializes in teaching beginner friendly techniques for at home styling and regularly tests new hair tools to provide honest, practical recommendations for everyday users.
