
Introduction
Bad hair days happen to everyone, and figuring out a new styling tool can feel like one more chore on an already busy morning. Learning hair waver basics at home does not have to be stressful, even if this is the first time picking one up. A hair waver is designed to make loose, beachy waves simple, without the twisting and wrist strain that curling irons often demand. Once the basic technique clicks, most people find it takes less time than blow drying.
This guide walks through what a hair waver actually is, how to use one safely, and which temperature suits fine, medium, or thick hair. It also compares wavers to curling irons, points out who benefits most from this tool, and offers a quick prep checklist before the first attempt. By the end, even a total beginner should feel ready to create smooth, natural looking waves at home.
What Is a Hair Waver?
A hair waver is a styling tool that uses shaped plates, usually in an S curve or wave pattern, instead of a round barrel. Hair gets clamped between the plates for a few seconds, and it comes out with a consistent, uniform wave. Unlike a curling wand, there is no wrapping motion involved.
Most modern wavers include: hairwaver
- Ceramic or tourmaline plates for even heat distribution
- Adjustable temperature dials
- Auto shutoff features for safety
- Multiple wave sizes, from tight crimps to loose beach waves
Because the plates do the shaping work, results tend to look more uniform than a curling iron, which depends heavily on hand technique.
How Do You Use a Hair Waver at Home?
The process is more beginner friendly than it looks. Once the rhythm is down, a full head typically takes fifteen to twenty five minutes depending on hair length and thickness.
- Start with clean, dry hair and apply a heat protectant spray
- Divide hair into four sections using clips
- Take a one inch subsection and clamp it near the roots, leaving about an inch of space
- Hold for eight to ten seconds, then release and move down the strand
- Repeat down the length, slightly overlapping each clamp for a seamless wave
- Let the hair cool completely before running fingers through it or brushing lightly
A common mistake is holding the waver in one spot too long. This can cause an unnatural crease instead of a soft bend. Working in smaller sections almost always produces a cleaner result.
Tips for a Natural Finish
- Alternate the direction of the waver on each section for a less uniform, more lived in look
- Leave the front pieces near the face slightly looser for softness
- Finish with a light texturizing spray instead of heavy gel to avoid a stiff, helmet like effect
Is a Hair Waver Easier Than a Curling Iron?
For most beginners, yes. A curling iron requires wrapping hair around a barrel and holding it steady, which takes practice to get consistent results. A waver simply clamps and releases, so there is less room for uneven curls or accidental burns from touching hot metal.
That said, curling irons offer more versatility for tight ringlets or very specific curl shapes. A waver is better suited for that relaxed, beachy texture rather than defined spiral curls. Choosing between them really comes down to the look someone wants and how much time they are willing to spend learning the technique.
What Temperature Should I Use on My Hair?
Temperature is where a lot of at home styling goes wrong. Too hot, and hair can become dry or damaged over time. Too cool, and the wave will not hold. According to hairstylists and heat tool manufacturers, temperature should be matched to hair type rather than set to the highest option out of habit.
Best Temperature for Fine Hair
Fine hair is more prone to heat damage, so a range between 260 and 300 degrees Fahrenheit is usually enough. Higher settings can cause breakage and frizz without adding extra hold. source: Instagram · natgeebeauty
Best Temperature for Medium Hair
Medium textured hair typically does well between 300 and 350 degrees Fahrenheit. This range offers enough heat to set a wave without excessive exposure time.
Best Temperature for Thick Hair
Thick or coarse hair often needs more heat to shape properly, generally between 350 and 400 degrees Fahrenheit. Thicker strands are more heat resistant, so this range rarely causes damage when paired with a heat protectant.
A simple rule many stylists recommend: start on the lower end of the range and increase only if the wave is not holding after a full cool down.
Can Beginners Use a Hair Waver?
Absolutely. In fact, a hair waver is often recommended as a starter tool because the clamp and hold method removes much of the guesswork involved in curling techniques. There is no need to master wrist angles or barrel direction.
Beginners should still keep a few safety habits in mind: hairwaver
- Always use a heat protectant before styling
- Keep sections thin for even heat distribution
- Avoid touching the plates directly, even after unplugging
- Practice on the back sections first, since mistakes are less visible there
Who Should Use a Hair Waver?
A hair waver suits a wide range of people, but it tends to be especially useful for a few groups.
- People who want a quick, low effort style before work or school
- Anyone new to heat styling who wants a lower learning curve
- Those with fine to medium hair who want texture without heavy damage risk
- People who prefer a natural, undone wave rather than tight curls
Thicker or very long hair can still use a waver, though it may take a bit longer to section and style fully.
Best Hair Waver for Beginners
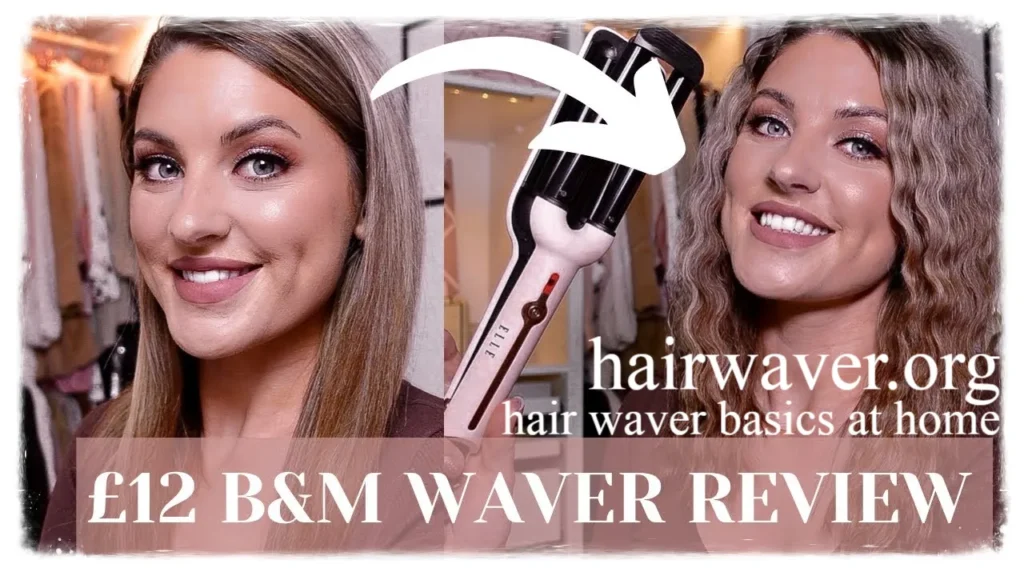
When shopping for a first waver, a few features make the learning process smoother. source: Merrick’s Art
- Adjustable heat settings, so temperature can be lowered while learning
- Auto shutoff for peace of mind
- A moderate barrel or plate size, since very large or very small sizes can be harder to control at first
- Ceramic or tourmaline coating, which glides through hair with less snagging
Reading reviews from other beginners can also help narrow down a reliable option before committing to a purchase.
Hair Preparation Checklist
Preparation makes a noticeable difference in how long a wave lasts. Before reaching for the waver, a quick checklist helps set things up for success. hairwaver
- Hair is fully dry, since heat tools should never be used on damp strands
- Heat protectant spray applied evenly through the lengths
- Hair brushed through to remove tangles
- Sections clipped up so styling stays organized
- A cool spot nearby to let finished sections set without touching them right away
Skipping the heat protectant step is one of the most common reasons waves look frizzy or feel damaged afterward.
Conclusion
Hair waver basics at home come down to a few core ideas: choosing the right temperature for hair type, sectioning properly, and letting each wave cool before touching it. Once those habits form, the process becomes quick and almost automatic. Compared to a curling iron, a waver often feels more forgiving for beginners while still delivering that soft, natural texture many people want.
Anyone ready to try this at home might want to start with a lower heat setting and a few practice sections before styling the whole head. What temperature and technique worked best for your hair? Sharing results with a friend who is also curious about heat styling can make the learning process a lot less intimidating.
FAQs
Does a hair waver work on short hair?
Yes, as long as there is enough length to clamp safely, usually around four inches or more.
How long do waves from a hair waver last?
Typically one to three days, depending on hair type and whether a setting spray is used.
Can a hair waver damage hair?
Any heat tool can cause damage if used too hot or too often, so heat protectant and moderate temperatures are important.
Is a hair waver good for thin hair?
Yes, though lower temperatures and shorter hold times work best to avoid stress on delicate strands.
Do I need special products for waver styling?
A heat protectant spray is essential, and a light texturizing spray can help waves last longer.
Author Bio: Awais Ali a beauty and lifestyle content writer who covers practical hair and skincare guides, focusing on simple, tested tips that fit into a busy everyday routine.
email: johanharwen@314gmail.com
Author Name: Awais Ali
