
Introduction
You want those gorgeous, cascading waves you see on social media, but every attempt leaves you frustrated with uneven results. Learning hair waver basics deep waves changes everything. This styling tool creates consistent, beautiful waves without the guesswork traditional curling irons demand.
Whether you are completely new to hair styling tools or switching from a curling iron, understanding hair waver basics deep waves sets you up for success. This guide covers everything from what a hair waver actually does to expert techniques that create salon quality results at home.
By the end, you will confidently use your hair waver to achieve stunning deep waves, understand how this differs from beach waves, and know exactly which hair type recommendations apply to your situation. Let us dive into everything you need to know.
What Is a Hair Waver?
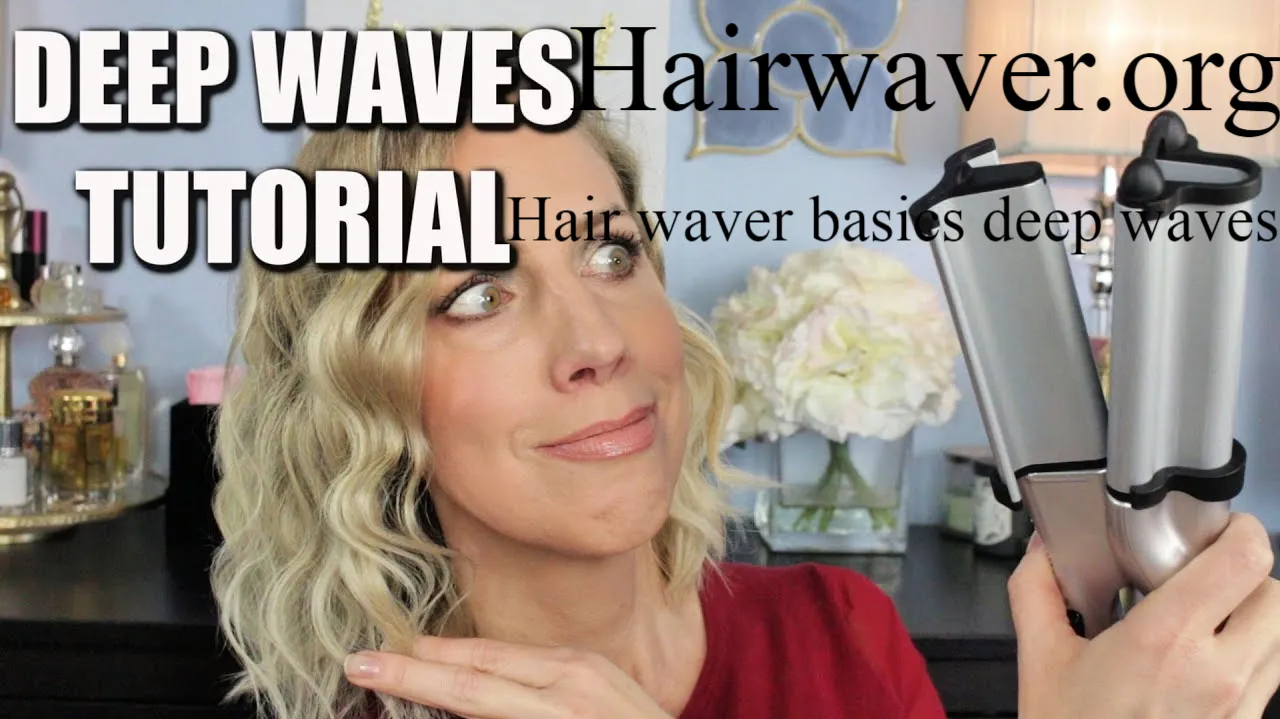
A hair waver is a styling tool featuring interlocking barrels that create uniform, S-shaped waves throughout your hair. Unlike curling irons that wrap hair around a single barrel, wavers press hair between two or three plates. This creates consistent wave patterns without twisting motion.
Most hair wavers offer interchangeable plates for different wave sizes. Deep wave plates typically feature wider, more pronounced curves. This creates dramatic, voluminous waves rather than subtle texture. The tool heats up quickly and works efficiently across various hair lengths and textures.
I personally switched from a curling wand to a waver two years ago. The consistency completely transformed my styling routine. Every wave looks identical, eliminating that lopsided look curling irons sometimes create.
How Do You Use a Hair Waver?
Using a hair waver follows a straightforward process once you understand the basics. Start with clean, dry hair for the best results. Apply heat protectant spray before styling to prevent damage.
Step by Step Instructions
- Section your hair into manageable pieces, typically four to six sections depending on thickness
- Heat your waver to the appropriate temperature for your hair type
- Place a small section of hair between the plates near your roots
- Close the waver and hold for eight to ten seconds
- Release and move to the next section, slightly overlapping the previous wave
- Continue down the length of hair until you reach the ends
- Repeat this process across all sections
- Let waves cool completely before touching or brushing
This methodical approach ensures consistent results throughout your entire head. Rushing through sections often creates uneven waves that look less polished. hairwaver
What Is the Difference Between Deep Waves and Beach Waves?
Deep waves and beach waves represent two distinct styling outcomes with different techniques and appearances.
Deep waves feature pronounced, defined S-shaped curves throughout the hair. These waves maintain their shape and structure, creating dramatic volume and movement. The pattern looks intentional and polished, perfect for formal occasions or bold everyday looks.
Beach waves, conversely, mimic that effortless, tousled look from a day at the ocean. These waves appear looser, more textured, and slightly undone. Beach waves often incorporate some straight pieces mixed with wavy sections for a natural, undone appearance.
The key difference lies in consistency and definition. Deep waves require precise sectioning and even heat application. Beach waves embrace imperfection, sometimes achieved by twisting hair before curling or using larger sections for looser results.
Are Hair Wavers Better Than Curling Irons?
This question depends entirely on your desired outcome and hair type. Neither tool is universally better. Each excels at different styling results.
Hair wavers create incredibly consistent, uniform wave patterns quickly. The interlocking plate design means you cannot easily create uneven curls. This consistency benefits beginners significantly. Curling irons offer more versatility, allowing you to create everything from tight ringlets to loose waves depending on technique. hairwaver
However, curling irons require more skill to achieve consistent results. The learning curve is steeper. Many beginners struggle with even heat distribution and consistent curl direction when using curling irons.
For pure deep wave creation specifically, hair wavers typically outperform curling irons in speed and consistency. If you want versatility across multiple curl types, a curling iron might serve you better long term.
Can Beginners Use a Hair Waver?
Absolutely. Hair wavers rank among the most beginner-friendly styling tools available. The clamp and hold mechanism removes the guesswork associated with wrapping hair around a curling iron barrel.
Why Beginners Succeed With Wavers
The tool essentially does the technical work for you. You simply need to section hair properly and hold for the correct duration. There is no wrapping technique to master, no worrying about which direction to curl, and minimal risk of accidentally burning yourself compared to curling irons. source: Who What Wear
Most beginners achieve satisfactory results on their very first attempt. Practice still improves your technique over time, particularly regarding section size and timing, but the fundamental process remains accessible from day one.
Expert Styling Tips for Perfect Deep Waves
Professional stylists recommend several techniques that elevate your deep wave results significantly.
Work with smaller sections than you think necessary. Thinner sections allow heat to penetrate evenly, creating more defined waves. Larger sections often result in weaker, less pronounced waves that fall out quickly.
Alternate your wave direction occasionally. While consistency matters, completely uniform direction throughout can look artificial. Slightly varying direction on some sections creates natural-looking movement.
Use a heat protectant every single time. Deep wave styling requires sustained heat exposure. Skipping protectant accelerates damage and dries out your hair over time.
Let waves cool before separating them with your fingers. Touching warm waves immediately often loosens the pattern before it sets properly. Patience during cooling significantly improves wave longevity.
Finish with a lightweight hairspray focused on roots and mid-lengths. This locks in your style without weighing down the wave pattern or making hair feel stiff.
Beginner-Friendly Instructions for First-Time Users
If this is your first time using a hair waver, start with these simplified guidelines.
Choose a lower heat setting initially, around 300 to 350 degrees Fahrenheit. You can always increase temperature once you understand how your hair responds. Starting too hot risks damage before you develop proper technique.
Practice on a small, hidden section first. The underneath layer near your neck works well for practicing timing and technique without visible mistakes if something goes wrong. source: Merrick’s Art
Set a timer or count consistently for each section. Beginners often hold sections for inconsistent durations, creating uneven waves. Counting to eight or ten every time creates more predictable results.
Do not panic if early attempts look imperfect. Like any skill, hair waving improves with repetition. Your third or fourth attempt will look noticeably better than your first.
Pros and Cons of Hair Wavers
| Pros | Cons |
|---|---|
| Consistent, uniform wave pattern | Less versatile than curling irons |
| Beginner-friendly technique | Limited to one wave style per plate set |
| Faster styling time overall | Interchangeable plates can be expensive |
| Reduced risk of burns | Bulkier than traditional curling irons |
| Creates dramatic, defined waves | Not ideal for tight curls or ringlets |
| Works well on various hair lengths | May require practice for root volume |
Hair Waver vs Curling Iron Comparison
| Feature | Hair Waver | Curling Iron |
|---|---|---|
| Learning curve | Easy | Moderate to difficult |
| Styling speed | Fast | Slower |
| Wave consistency | Highly uniform | Varies by skill |
| Versatility | Limited to wave patterns | Multiple curl types possible |
| Best for | Deep waves, beach waves | Ringlets, spiral curls, waves |
| Price range | Moderate to high | Wide range available |
| Heat damage risk | Moderate | Moderate to high |
| Beginner suitability | Excellent | Fair |
Hair Type Recommendations
Different hair types respond uniquely to hair waver styling. Understanding your specific hair characteristics helps optimize your results. hairwaver
Fine hair benefits from lower heat settings around 300 degrees. Fine strands wave quickly and hold shape well without excessive heat. Overheating fine hair risks significant damage and breakage.
Thick hair typically requires higher heat settings between 350 and 400 degrees. Thicker strands need more heat penetration to hold wave patterns effectively. Working in smaller sections becomes especially important for thick hair.
Curly hair can use wavers to enhance and define natural texture, though results vary significantly based on your natural curl pattern. Some curly-haired individuals skip wavers entirely, preferring to enhance natural texture instead.
Color-treated hair requires extra caution regarding heat exposure. Chemically processed hair often experiences more damage from heat styling. Always use heat protectant and consider slightly lower temperatures than recommended for virgin hair.
Short hair works well with hair wavers, though section size needs adjustment. Shorter lengths require smaller, more precise sections to achieve visible wave patterns.
Conclusion
Mastering hair waver basics deep waves opens up a world of consistent, beautiful styling possibilities. This tool removes much of the guesswork associated with traditional curling methods while delivering dramatic, salon quality results.
Remember that practice improves your technique over time. Start with proper heat protectant, appropriate temperature settings for your hair type, and patient section-by-section application. Whether you are a complete beginner or transitioning from curling irons, hair waver basics deep waves techniques covered here set you up for success.
What hair type are you working with, and which tip will you try first? Share your experience once you attempt these techniques, and feel free to pass this guide along to anyone struggling with achieving consistent waves.
FAQs
1. How long do deep waves from a hair waver typically last?
Deep waves usually last one to three days depending on hair type, products used, and activity level. Fine hair may need touch-ups sooner than thick or coarse hair.
2. What temperature should I use for deep waves?
Most hair types respond well between 300 and 400 degrees Fahrenheit. Fine hair should use lower settings around 300, while thick hair may need 350 to 400 degrees.
3. Can I use a hair waver on wet hair?
No, always use hair wavers on completely dry hair. Applying heat to wet hair causes significant damage and can lead to breakage or burning.
4. Do hair wavers work on short hair?
Yes, hair wavers work effectively on short hair, though you need smaller sections and careful placement to achieve visible wave patterns.
5. How often should I clean my hair waver plates?
Clean your plates every few uses to remove product buildup. Use a damp cloth once the tool cools completely to maintain performance and prevent buildup transfer.
Hair Waver Basics Mermaid Waves
About the Author : Jessica Reyes is a licensed cosmetologist and hair styling specialist with eight years of professional salon experience. She specializes in heat styling techniques and has trained numerous clients on at-home styling methods. Jessica regularly tests and reviews hair styling tools to provide honest, practical advice. When not working with clients, she creates educational content helping everyday people achieve professional looking hairstyles at home.
email: johanharwen@314gmail.com
Author Name: Jessica Reyes
